Controller Guide
This is a guide for all the different controller types that we support.
Jump To:
- HID: Keyboard
- NS1: Wired Controller
- NS2: Wired Controller
- NS1: Wireless Pro Controller
- NS1: Wireless Left/Right Joycon
- NS1: Wired Pro Controller
- NS1: Wired Left/Right Joycon
HID: Keyboard
Supported Devices/Boards:
- ESP32-S3
- Pico W (UART mode)
- Pico 2 W (UART mode)
- RP2040 Family
- RP2350 Family
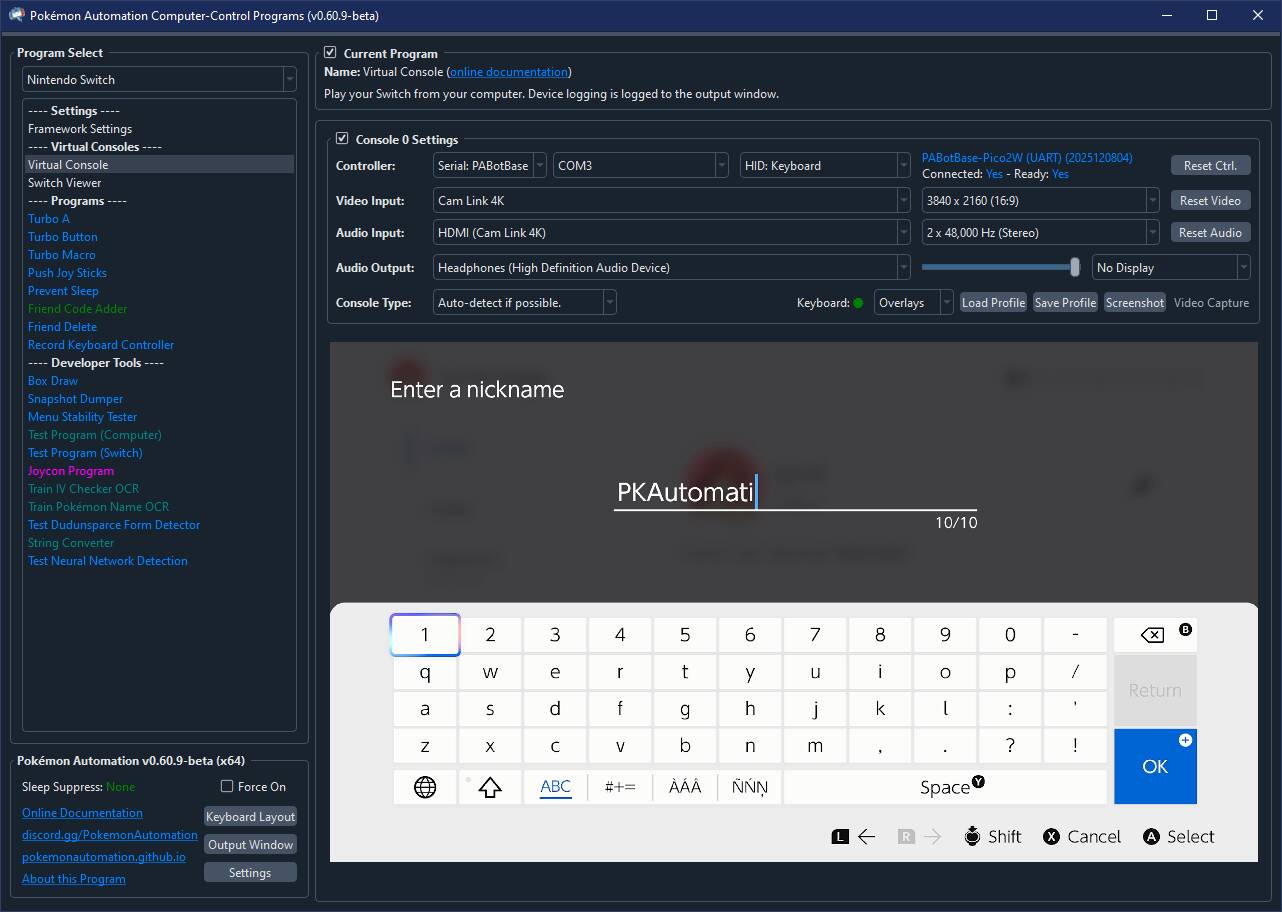
The HID keyboard is just a standard USB keyboard. Since it is not a controller, it cannot be used to play the Nintendo Switch. But it can be used to enter text fields as well as code entry.
How to Connect:
Since the HID keyboard is not a game controller, it does not connect through the grip menu. Instead, it connects automatically whenever it's physically connected to the Switch.
Just bring up any Switch menu that has a keyboard or a numberpad, and the HID keyboard will work. Programs that do code entry (such as Fast Code Entry) will enter the code right away. Unlike the regular wired controllers, you do not need to press a button to connect. If your window has keyboard controls active, just begin typing into your keyboard and it will show up on the Switch's text field.
Keyboard Layouts:
The default keyboard layout is the US QWERTY layout. If either your computer or your Switch is not QWERTY, what you type into your keyboard will not be what shows up on the Switch.
If your computer's keyboard layout is not QWERTY, you will need to change the option in the settings:
- Settings (bottom left corner of the program) -> "System Keyboard Layout"
As of this writing, we only support QWERTY and the French AZERTY. We are open to contributions of other keyboard layouts.
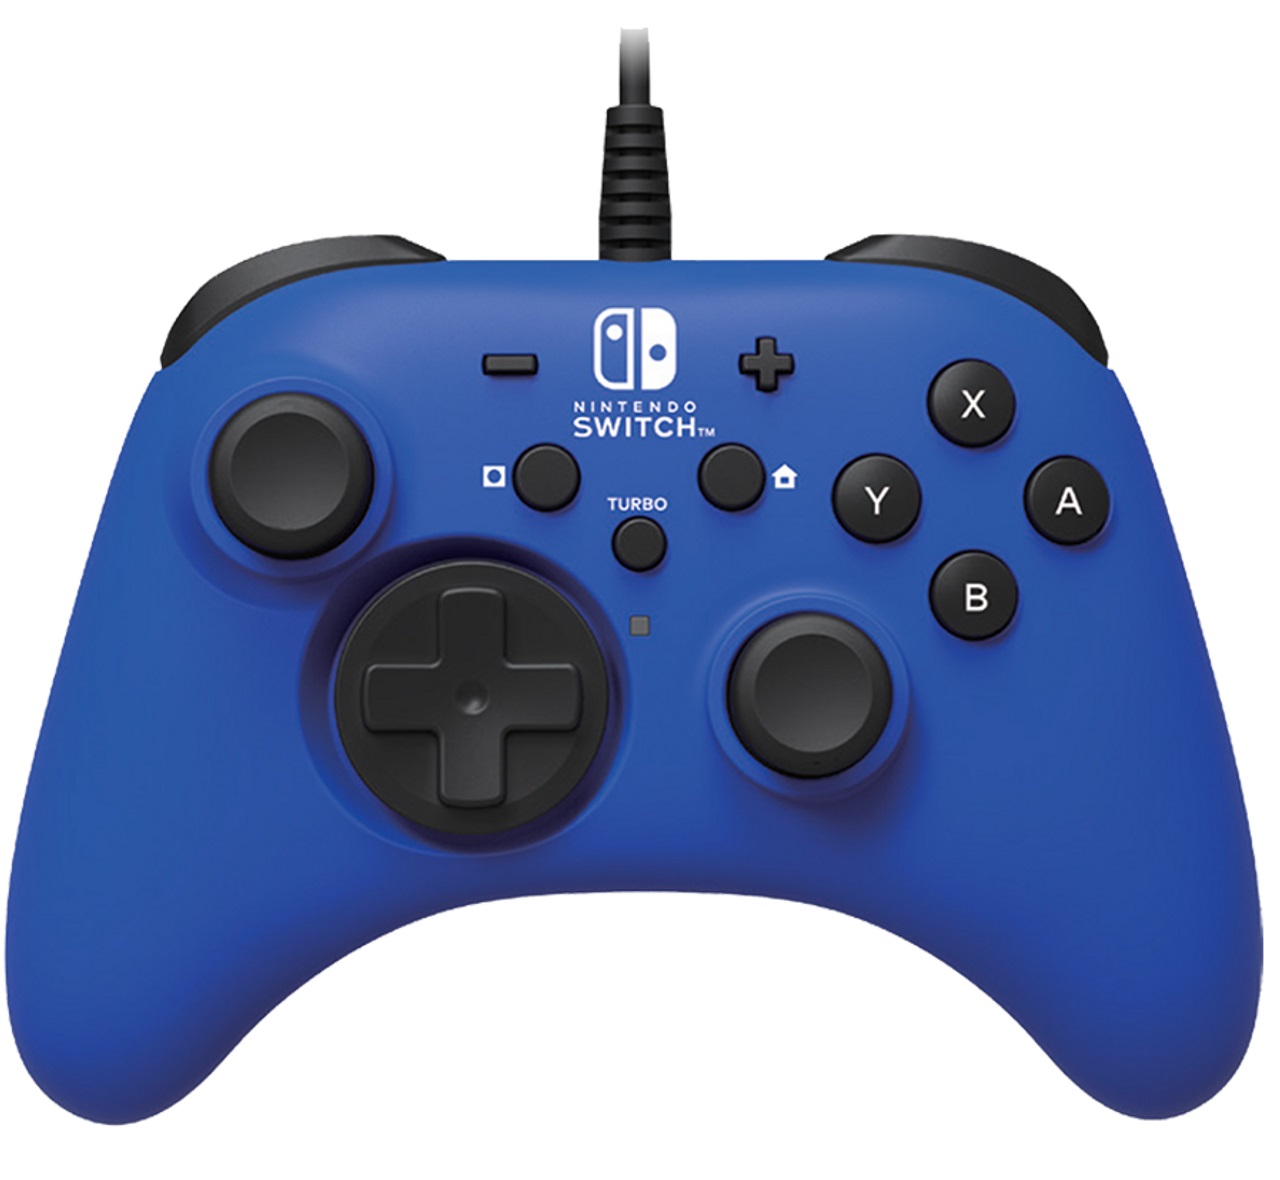
NS1: Wired Controller

Supported Devices/Boards:
- ESP32-S3
- Pico W (UART mode)
- Pico 2 W (UART mode)
- RP2040
- RP2350
- CFW: sys-botbase 2
- CFW: sys-botbase 3
This is the standard 3rd party wired controller from the likes of Horipad and Power A. It supports 14 buttons and 2 joysticks. It does not support rumble or gyro. Furthermore, it always shows up as a black controller in the Switch menus.
How to Connect:
As a wired controller, you do not need to be in the grip menu to connect. Just press any button and it will connect.
Note that if you are in a 1-player game and you already have a controller connected as the 1st controller slot, you will not be able to connect any other controller until you either disconnect that controller or return to the Switch menus.
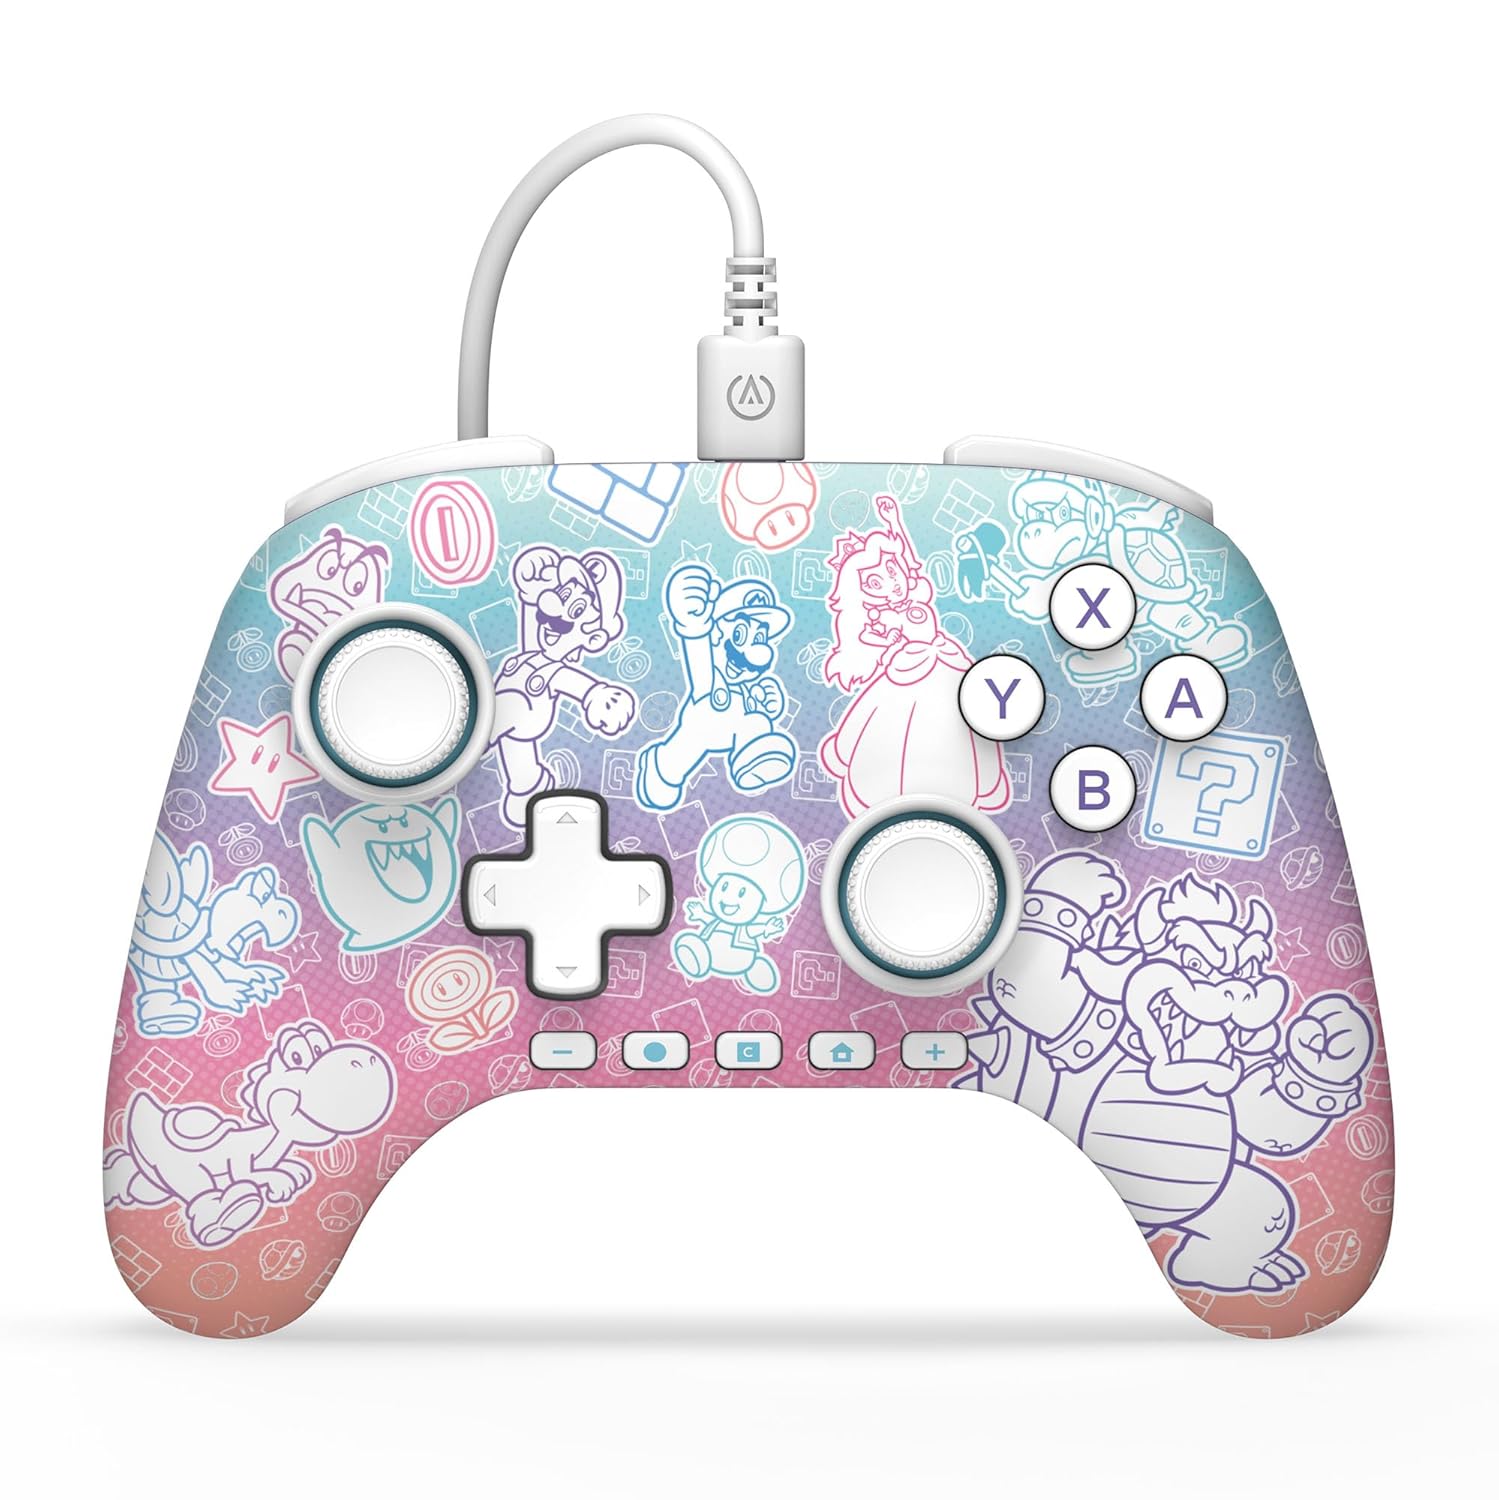
NS2: Wired Controller

Supported Devices/Boards:
- ESP32-S3
- Pico W (UART mode)
- Pico 2 W (UART mode)
- RP2040 Family
- RP2350 Family
This is the standard 3rd party wired controller for the Switch 2 from the likes of Horipad and Power A. It supports 17 buttons and 2 joysticks and is backwards compatible with the Switch 1. It does not support rumble or gyro. Furthermore, it always shows up as a black controller in the Switch menus.
As this is a Switch 2 controller, it supports the GL, GR, and C buttons on the Switch 2. These buttons do nothing on the Switch 1. As of this writing, this is the only controller that we support which has the GL, GR, and C buttons.
This controller does not work on older Switch firmware versions. If you are running such an old Switch firmware, you need to either update to something newer, or change controllers to the NS1: Wired Controller. Nintendo allows 3rd party controllers by whitelist only. Firmware versions that predate the existence of this controller will not work.
How to Connect:
As a wired controller, you do not need to be in the grip menu to connect. Just press any button and it will connect.
Note that if you are in a 1-player game and you already have a controller connected as the 1st controller slot, you will not be able to connect any other controller until you either disconnect that controller or return to the Switch menus.
NS1: Wireless Pro Controller

Supported Devices/Boards:
- ESP32
- Pico W (all modes)
- Pico 2 W (all modes)
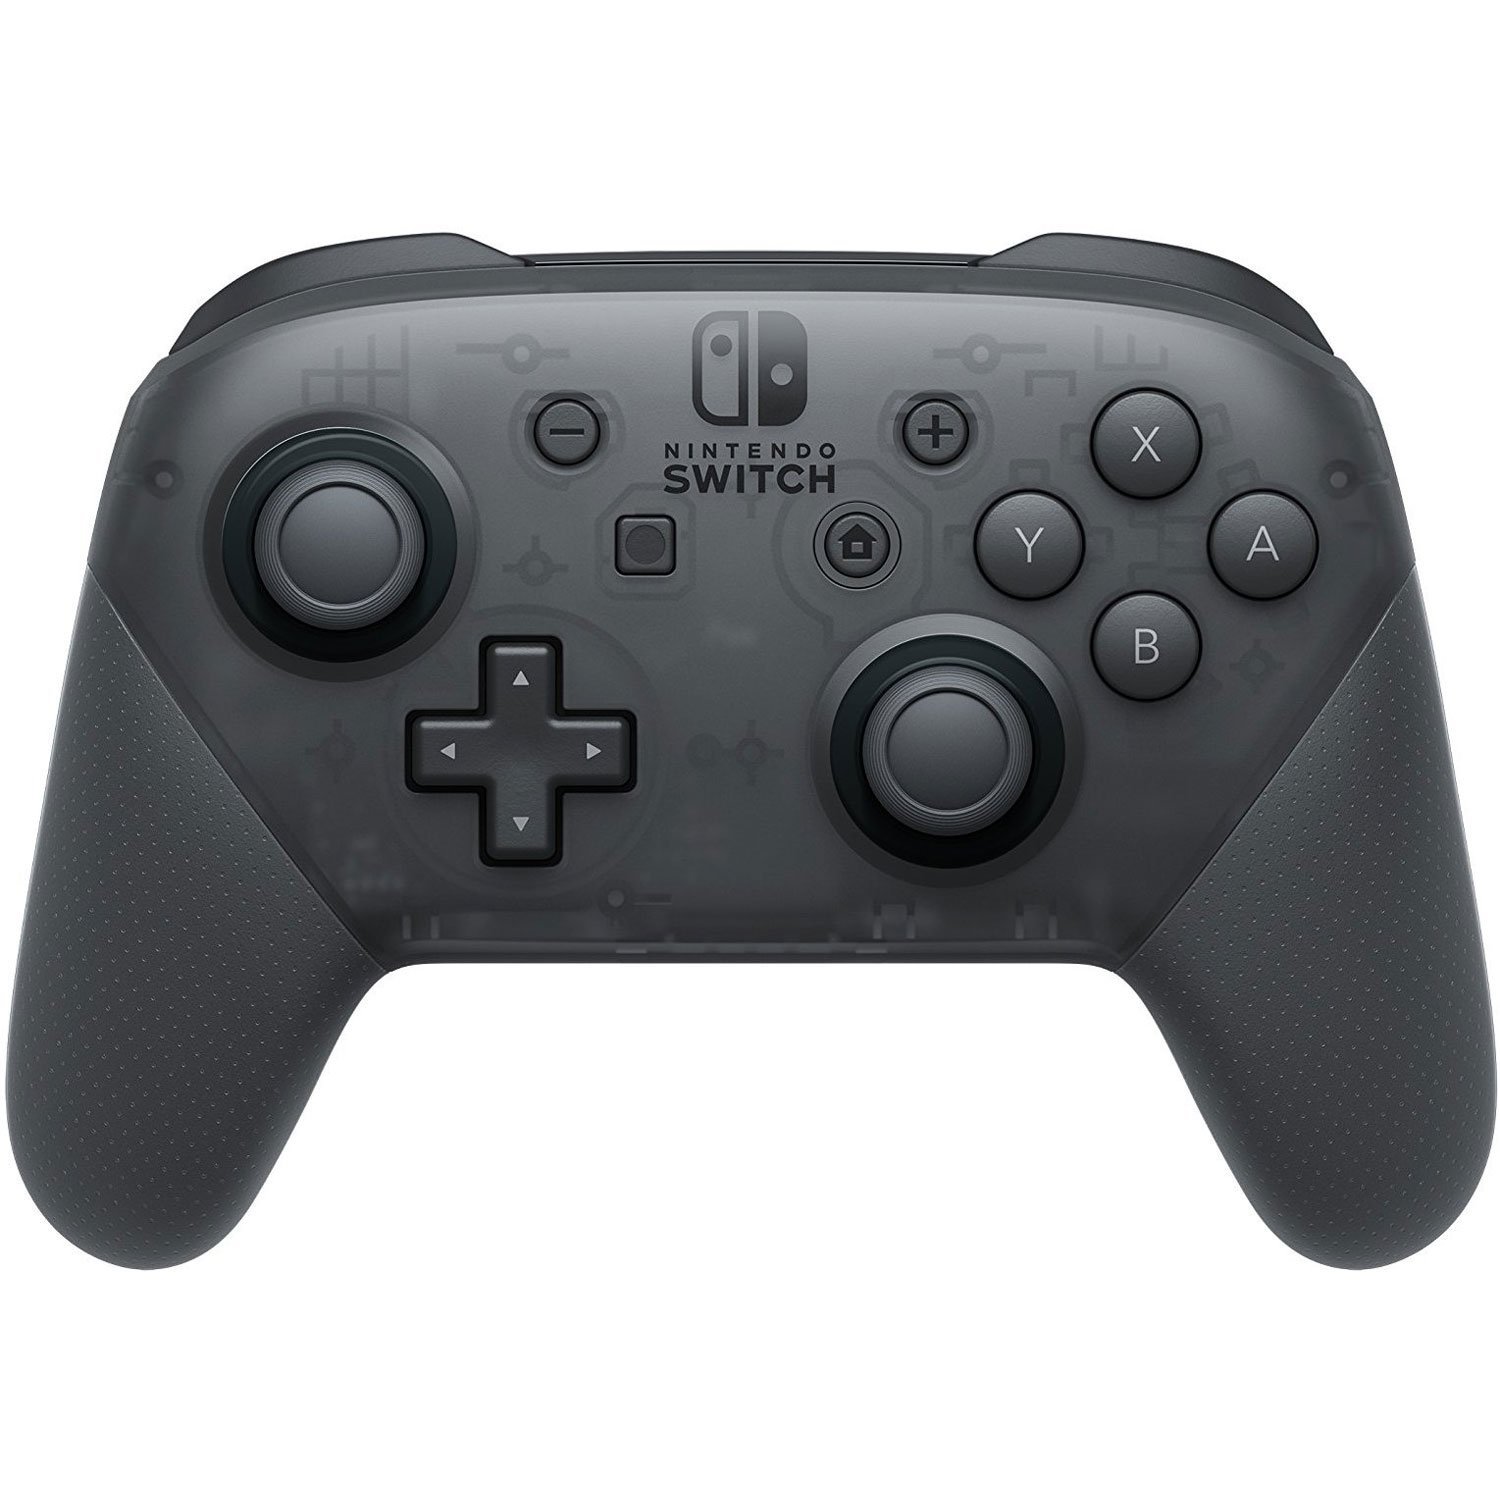
This is the official OEM Pro Controller for the Nintendo Switch. It supports 14 buttons, 2 joysticks, rumble, gyro, NFC, and wake up (though this project does not support gyro, NFC or wake up).
This controller supports custom colors. As a wireless controller, this is useful for determining which device is connected to which Switch when there are multiple setups in the same vicinity.
How to Connect:
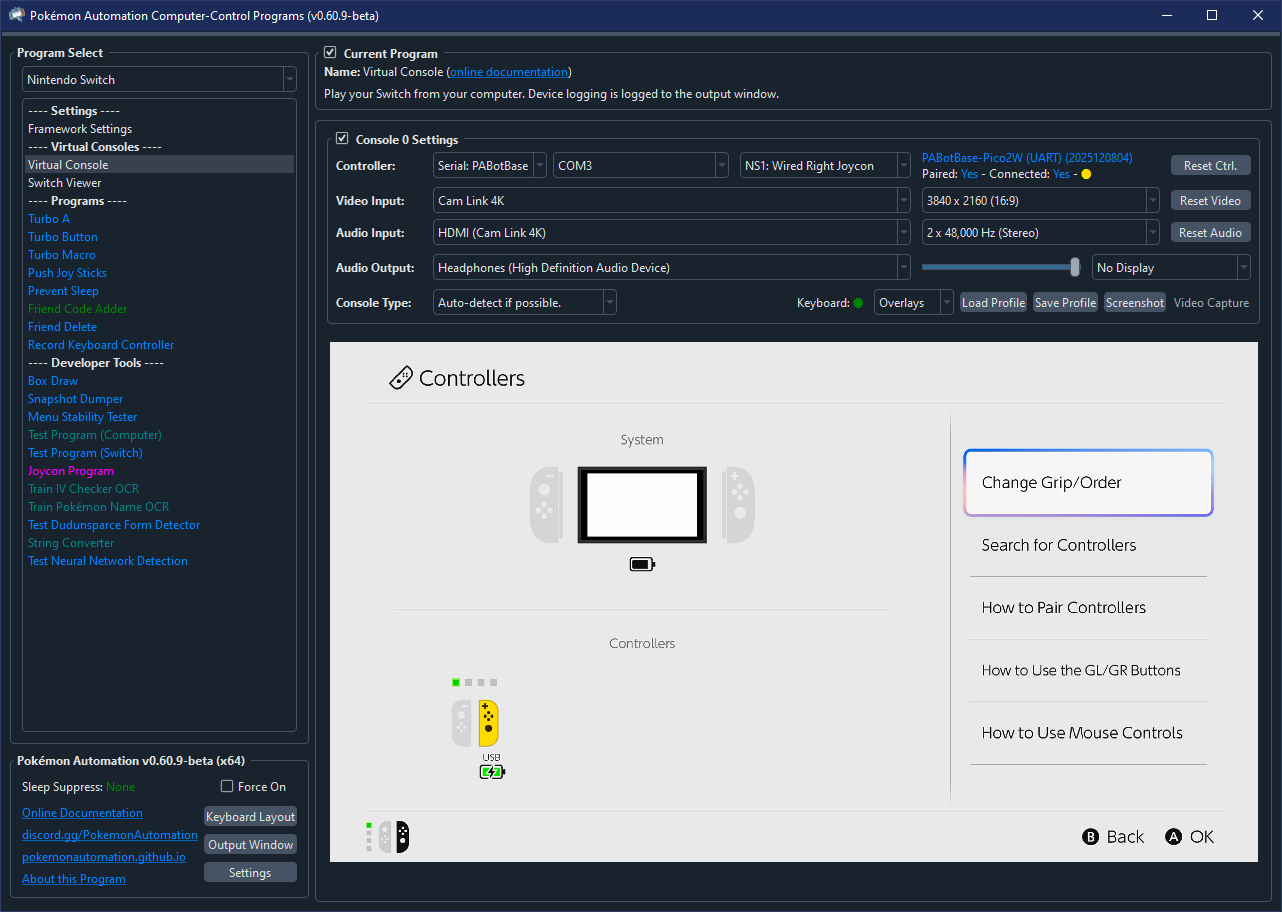
As a wireless controller, it first needs to be paired with the Switch via the grip menu.
- Navigate to the grip menu by other means.
- In the controller dropdown, change the controller to
NS1: Wireless Pro Controller. - Wait a few seconds for it to connect. If successful, it will appear as the image above (with randomized colors).
Pairing Behavior:
(This section is the same for all the Switch 1 wireless controllers.)
Once you connect the controller to the Switch, it will remember its pairing state with that Switch. Each wireless controller (Pro Controller, Left/Right Joycon, etc...) has a separate pairing state. So pairing one will not automatically pair the others.
Keep in mind the following behaviors:
- If the controller is paired with a console, it will show
Paired: Yes. - When you switch from a different controller to a wireless controller that was previous paired, it will reconnect to the same console it is paired with.
- When you click "Reset Ctrl", it will disconnect and try to reconnect to the console that it was paired with.
- When you SHIFT + click "Reset Ctrl", not only does it reset, it will clear the pairing state and try to pair with a new console.
- The device (ESP32/Pico) will forget its pairing state when it loses power. So unlike a real controller, it is not stored in non-volatile memory.
Once the controller is paired with a console, it will be able to reconnect outside of the grip menu.
Troubleshooting:
- If the device to fails connect after multiple attempts, try rebooting the Switch.
- If it stuck on
Paired: Yes - Connected: No, it probably means the device is paired with a different Switch. SHIFT + click "Reset Ctrl" to clear the pairing state and re-pair in the grip menu. If you previously paired using the wired version of this controller, you may be hitting Issue 887. - If you see
Disconnected by console.when trying to reconnect, you are hitting Issue 800. SHIFT + click "Reset Ctrl" to clear the pairing state and re-pair in the grip menu.
NS1: Wireless Left/Right Joycon

Supported Devices/Boards:
- ESP32
- Pico W (all modes)
- Pico 2 W (all modes)
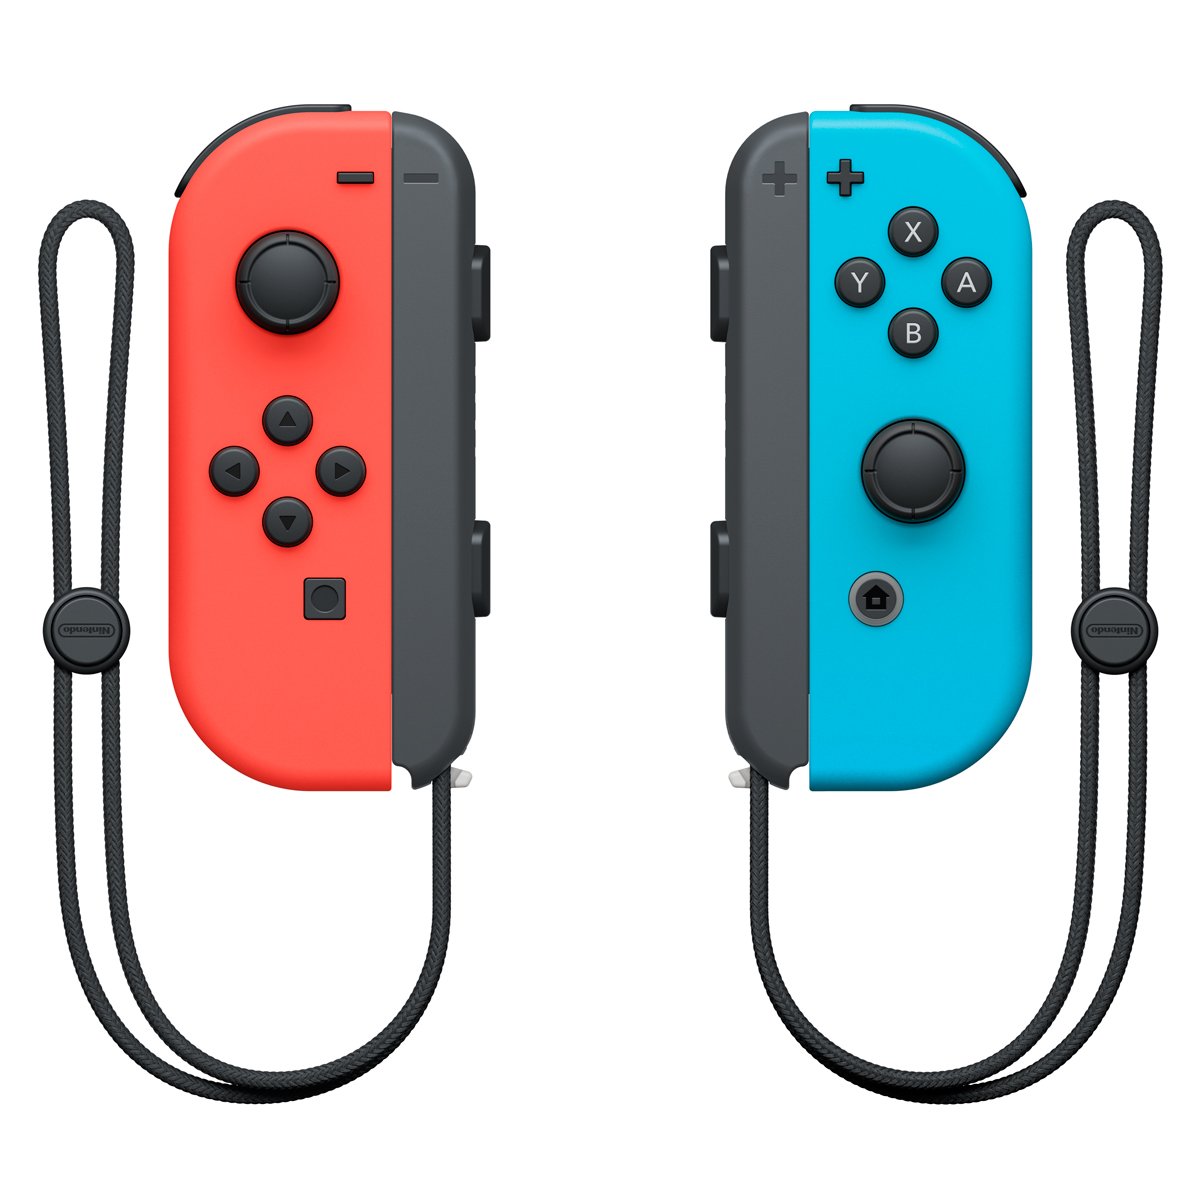
These are the official OEM Joycons for the Nintendo Switch. They support 11 buttons, 1 joystick, rumble, gyro, NFC, and wake up (though this project does not support gyro, NFC or wake up).
These joycon controllers support custom colors. As wireless controllers, this is useful for determining which device is connected to which Switch when there are multiple setups in the same vicinity.
As of this writing, the right joycon is primarily used for Pokémon Let's Go Pikachu and Eevee (LGPE). While both joycons can be used to play LGPE, we choose the right joycon since it has the Home button for soft resets. No programs use the left joycon.
How to Connect:
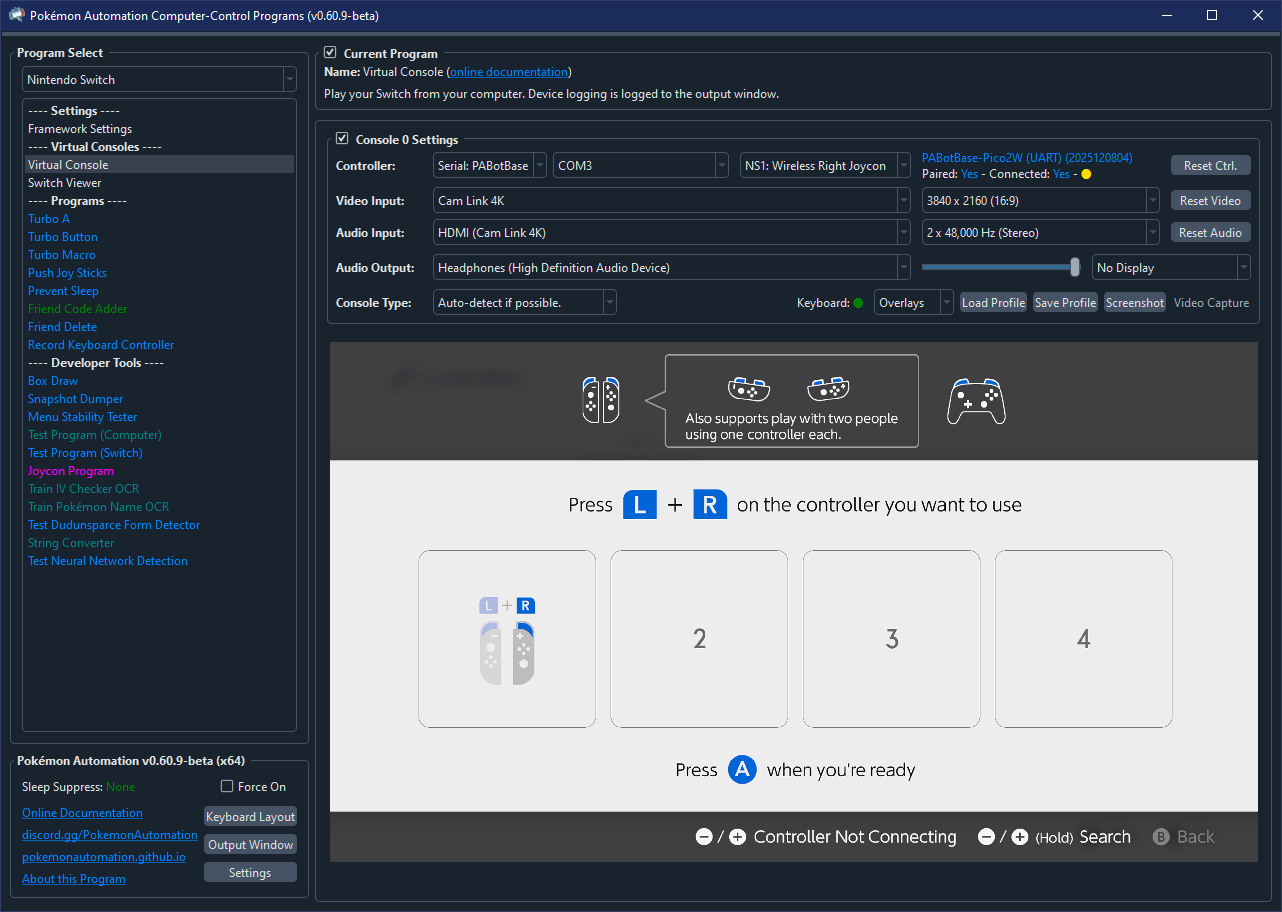
As a wireless controller, it first needs to be paired with the Switch via the grip menu.
- Navigate to the grip menu by other means.
- In the controller dropdown, change the controller to
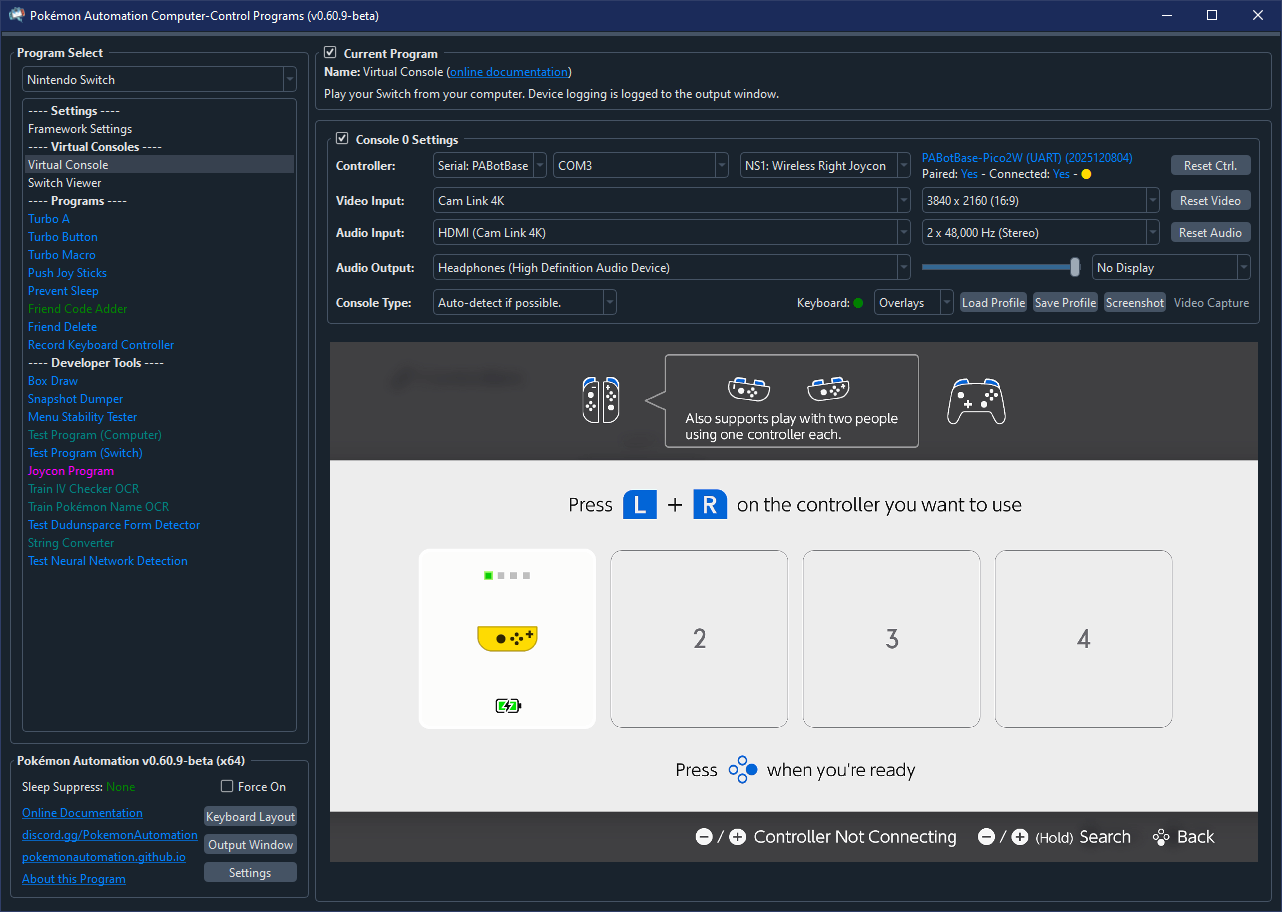
NS1: Wireless Left JoyconorNS1: Wireless Right Joycon. - Wait a few seconds for it to connect. If successful, it will appear as a grey rotating joycon image below.
When the joycon appears as a light grey rotating image, the Switch wants you to pair it with a second joycon before it will show up. For our purposes we do not pair joycons together since you can just use the Pro Controller instead.
There are two ways to exit the grip menu as a joycon without pairing it with a 2nd joycon:
Enter Horizontal Mode:
One way to exit the grip menu with a single joycon is to enter horizontal mode. Press SR and SL simultaneously to enter horizontal mode. Using the default keyboard mappings, this is F1 and F3.
Exit to Home (Right Joycon Only):
If you are using the right joycon, you can exit directly to the Home menu by simply pressing the Home button. This will enter the Home menu with only one joycon (half a controller). So you won't be able to do anything that requires the left half.
Nevertheless, this is the preferred way to setup and enter LGPE for automation.
Pairing Behavior:
(This section is the same for all the Switch 1 wireless controllers.)
Once you connect the controller to the Switch, it will remember its pairing state with that Switch. Each wireless controller (Pro Controller, Left/Right Joycon, etc...) has a separate pairing state. So pairing one will not automatically pair the others.
Keep in mind the following behaviors:
- If the controller is paired with a console, it will show
Paired: Yes. - When you switch from a different controller to a wireless controller that was previous paired, it will reconnect to the same console it is paired with.
- When you click "Reset Ctrl", it will disconnect and try to reconnect to the console that it was paired with.
- When you SHIFT + click "Reset Ctrl", not only does it reset, it will clear the pairing state and try to pair with a new console.
- The device (ESP32/Pico) will forget its pairing state when it loses power. So unlike a real controller, it is not stored in non-volatile memory.
Once the controller is paired with a console, it will be able to reconnect outside of the grip menu.
Troubleshooting:
- If the device to fails connect after multiple attempts, try rebooting the Switch.
- If it gets stuck on
Paired: Yes - Connected: No, it probably means the device is paired with a different Switch. SHIFT + click "Reset Ctrl" to clear the pairing state and re-pair in the grip menu. If you are using the Pico W (UART) mode and previously paired using the wired version of this controller, you may be hitting Issue 887. - If you see
Disconnected by console.when trying to reconnect, you are hitting Issue 800. SHIFT + click "Reset Ctrl" to clear the pairing state and re-pair in the grip menu.
NS1: Wired Pro Controller

Supported Devices/Boards:
- ESP32-S3
- Pico W (UART mode)
- Pico 2 W (UART mode)
- RP2040 Family
- RP2350 Family
This is the same as the wireless official OEM Pro Controller for the Nintendo Switch. But rather than wireless, it is connected to the Switch over USB. It supports mostly the same features. (14 buttons, 2 joysticks, rumble, gyro, etc...)
This controller supports custom colors for aesthetic purposes.
How to Connect:
Unlike the 3rd party wired controllers, there is one additional step to use this controller. You must enable the following option:
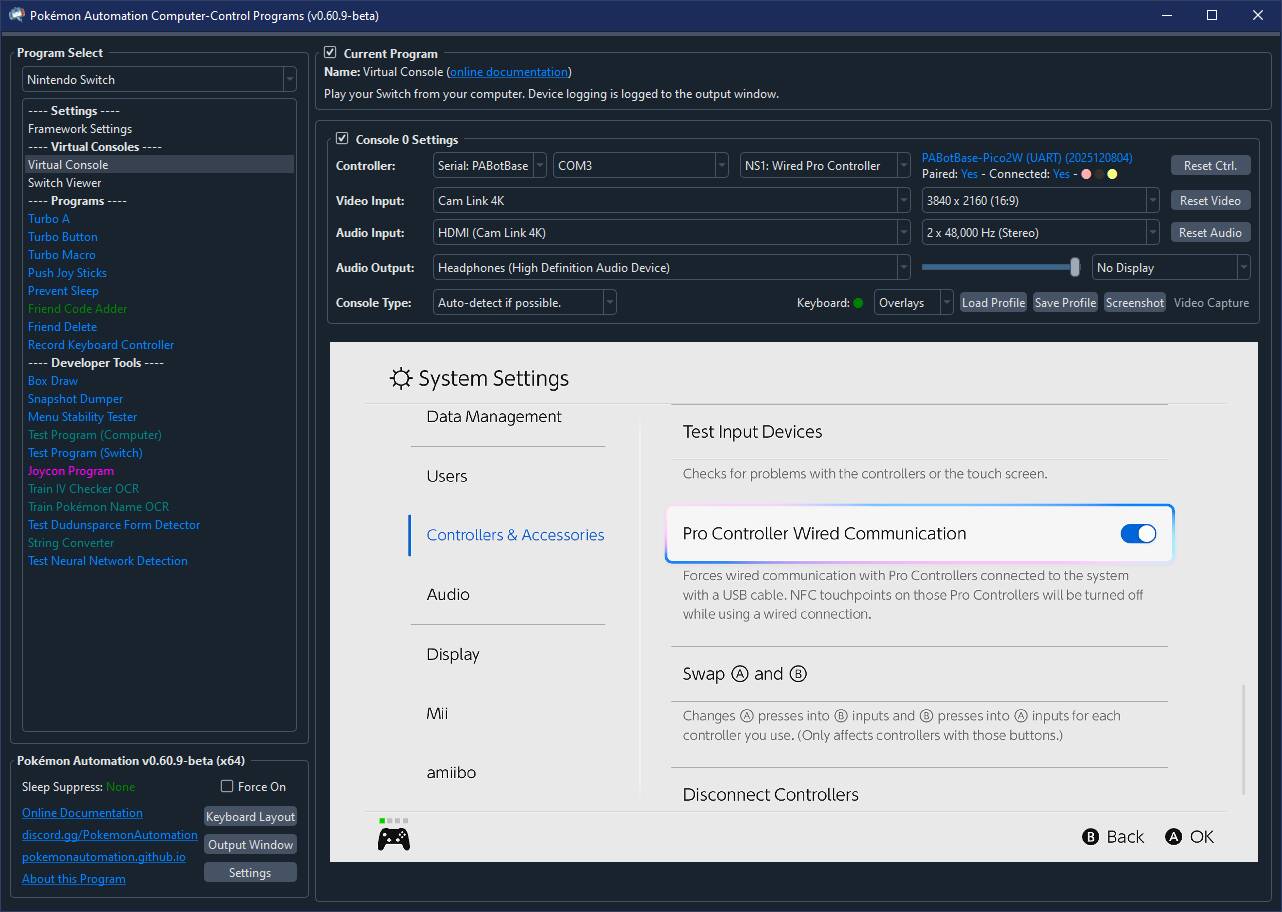
This extra step is needed because the Pro Controller is naturally a wireless controller. So Nintendo intends users to use it wirelessly instead of over USB.
After you have enabled this option, it will connect the same way as any other wired controller. Just press any button and it will connect. You do not need to be in the grip menu. You do not need pair it.
Note that if you are in a 1-player game and you already have a controller connected as the 1st controller slot, you will not be able to connect any other controller until you either disconnect that controller or return to the Switch menus.
Pairing the Wireless Controller:
The Pico W and Pico 2 W (UART mode) is unique in that they support both the wired and wireless versions of this controller. In keeping with the spirit of the real thing, both wired and wireless versions of the controller share the same state. (same colors, same pairing, same MAC address) Thus they share the same entry in the color selection table. If you pair one, you automatically pair the other.
Therefore, once you connect to the Switch using the wired Pro Controller, it automatically pairs it for wireless. So you can connect to it via the wireless Pro Controller outside of the grip menu.
NS1: Wired Left/Right Joycon
Supported Devices/Boards:
- ESP32-S3
- Pico W (UART mode)
- Pico 2 W (UART mode)
- RP2040 Family
- RP2350 Family
Despite the fact that Nintendo never released any wired joycons, the protocol for it exists. So like the Pro Controller, there are wired versions of the joycons! It is possible that this is related to the original joycon charging grips which could connect a joycon to the Switch over USB. But we're not sure and it doesn't really matter...
This is the same as the wireless official OEM Joycons for the Nintendo Switch. But rather than wireless, it is connected to the Switch over USB. It supports mostly the same features. (11 buttons, 1 joystick, rumble, gyro, etc...)
This controller supports custom colors for aesthetic purposes.
How to Connect:
Unlike the 3rd party wired controllers, there is one additional step to use this controller. You must enable the following option:
This extra step is needed because joycons are naturally wireless controllers. So Nintendo intends users to use these wirelessly instead of over USB.
After you have enabled this option, it will connect the same way as any other wired controller. Just press any button and it will connect. You do not need to be in the grip menu. You do not need pair it.
Note that if you are in a 1-player game and you already have a controller connected as the 1st controller slot, you will not be able to connect any other controller until you either disconnect that controller or return to the Switch menus.
Pairing the Wireless Controller:
The Pico W and Pico 2 W (UART mode) is unique in that they support both the wired and wireless versions of this controller. In keeping with the spirit of the real thing, both wired and wireless versions of the controller share the same state. (same colors, same pairing, same MAC address) Thus they share the same entry in the color selection table. If you pair one, you automatically pair the other.
Therefore, once you connect to the Switch using a wired joycon, it automatically pairs it for wireless. So you can connect to it via the wireless version of the same joycon outside of the grip menu.
Discord Server:
