Controller List
This is a full list of devices and controllers that we currently support. For the full setup guide, see Getting Started.
For a list of deprecated and discontinued setups, see: Deprecated and Discontinued Controller List
Terminology:
- Device - A microcontroller such as an ESP32, Arduino, Teensy, etc...
- Controller - A game controller such as the Nintendo Pro Controller or Joycon.
- Setup or Controller Setup - A setup where a "device" is emulating a "controller" for automation.
Controller Setups
This table lists all the device and controller combinations that we support in this project.
Recommended Setups:
| Device Type | Supported Controllers | Setup Difficulty (Scale 1-10) |
Guides | |
|---|---|---|---|---|
 |
Raspberry Pi Pico W Raspberry Pi Pico 2 W (USB Mode) |
NS1: Wireless Pro Controller NS1: Wireless Left Joycon NS1: Wireless Right Joycon |
1 | Guide |
 |
ESP32 | NS1: Wireless Pro Controller NS1: Wireless Left Joycon NS1: Wireless Right Joycon |
3 | Windows Mac Video Tutorial |
 |
ESP32-S3 | HID: Keyboard NS1: Wired Controller NS2: Wired Controller NS1: Wired Pro Controller NS1: Wired Left Joycon NS1: Wired Right Joycon |
3 | Windows Video Tutorial |
 |
CFW: sys-botbase 3 | NS1: Wired Controller | 2 | Guide |
Other Supported Setups:
| Device Type | Supported Controllers | Setup Difficulty (Scale 1-10) |
Guides | |
|---|---|---|---|---|
 |
RP2040 Family RP2350 Family |
HID: Keyboard NS1: Wired Controller NS2: Wired Controller NS1: Wired Pro Controller NS1: Wired Left Joycon NS1: Wired Right Joycon |
5 | Guide |
|
Raspberry Pi Pico W Raspberry Pi Pico 2 W (UART Mode) |
HID: Keyboard NS1: Wired Controller NS2: Wired Controller NS1: Wired Pro Controller NS1: Wired Left Joycon NS1: Wired Right Joycon NS1: Wireless Pro Controller NS1: Wireless Left Joycon NS1: Wireless Right Joycon |
5 | Guide |
 |
RP2040 Family RP2350 Family (Advanced UART Mode) |
HID: Keyboard NS1: Wired Controller NS2: Wired Controller NS1: Wired Pro Controller NS1: Wired Left Joycon NS1: Wired Right Joycon |
10 | Guide |
|
Raspberry Pi Pico W Raspberry Pi Pico 2 W (Advanced UART Mode) |
HID: Keyboard NS1: Wired Controller NS2: Wired Controller NS1: Wired Pro Controller NS1: Wired Left Joycon NS1: Wired Right Joycon NS1: Wireless Pro Controller NS1: Wireless Left Joycon NS1: Wireless Right Joycon |
10 | Guide |
Setup Comparison Table:
| Setup | Supported Controllers | Price (per Unit) | Setup Difficulty (Scale 1-10) |
Notes: |
|---|---|---|---|---|
| Raspberry Pi Pico W Raspberry Pi Pico 2 W (USB Mode) |
NS1: Wireless Pro Controller NS1: Wireless Left Joycon NS1: Wireless Right Joycon |
Single: $8 Volume: $7 |
1 | Upgradable to UART mode. |
| ESP32 | NS1: Wireless Pro Controller NS1: Wireless Left Joycon NS1: Wireless Right Joycon |
Single: $10 Volume: $4 |
3 | Formerly very buggy. Much more stable with v0.67.4+. D1 Mini variant is best for traveling. |
| ESP32-S3 | HID: Keyboard NS1: Wired Controller NS2: Wired Controller NS1: Wired Pro Controller NS1: Wired Left Joycon NS1: Wired Right Joycon |
Single: $15 Volume: $8 |
3 | Best wired setup by far. Workhorse for most seasoned users. |
| RP2040 Family RP2350 Family |
HID: Keyboard NS1: Wired Controller NS2: Wired Controller NS1: Wired Pro Controller NS1: Wired Left Joycon NS1: Wired Right Joycon |
Single: $17 Volume: $8 |
5 | Vulnerable to power glitching. Exposed pins can be annoying. |
| Raspberry Pi Pico W Raspberry Pi Pico 2 W (UART Mode) |
HID: Keyboard NS1: Wired Controller NS2: Wired Controller NS1: Wired Pro Controller NS1: Wired Left Joycon NS1: Wired Right Joycon NS1: Wireless Pro Controller NS1: Wireless Left Joycon NS1: Wireless Right Joycon |
Single: $19 Volume: $10 |
5 | Vulnerable to power glitching. Exposed pins can be annoying. |
| RP2040 Family RP2350 Family (Advanced UART Mode) |
HID: Keyboard NS1: Wired Controller NS2: Wired Controller NS1: Wired Pro Controller NS1: Wired Left Joycon NS1: Wired Right Joycon |
Single: $28+ Volume: $10 |
10 | Hardest to build. |
| Raspberry Pi Pico W Raspberry Pi Pico 2 W (Advanced UART Mode) |
HID: Keyboard NS1: Wired Controller NS2: Wired Controller NS1: Wired Pro Controller NS1: Wired Left Joycon NS1: Wired Right Joycon NS1: Wireless Pro Controller NS1: Wireless Left Joycon NS1: Wireless Right Joycon |
Single: $30+ Volume: $12 |
10 | Best final product. Hardest to build. |
Device Types
A "device" is a microcontroller or development board that we will use to implement a game controller.
| Image | Description |
|---|---|
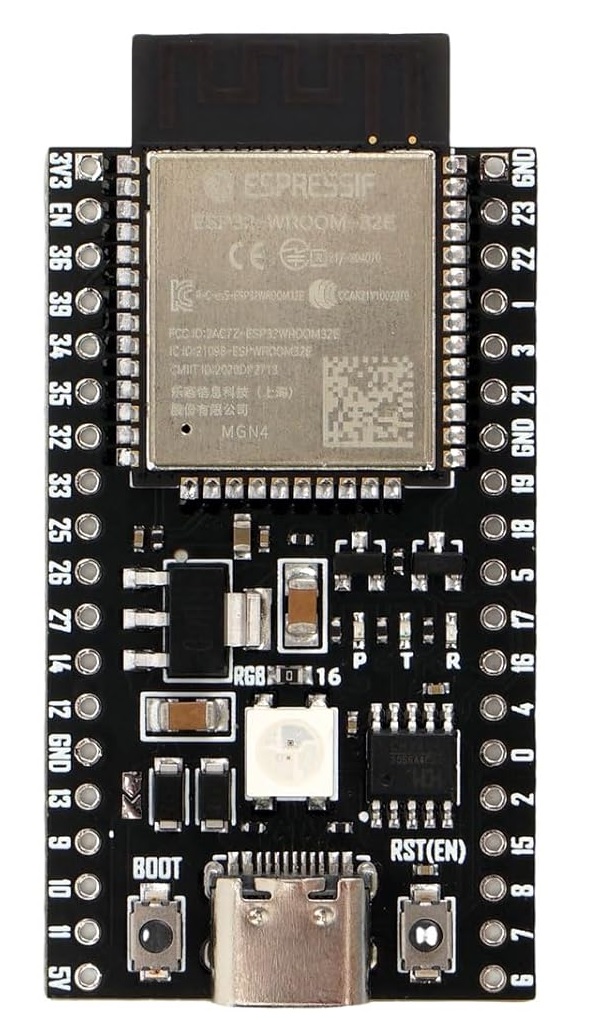 |
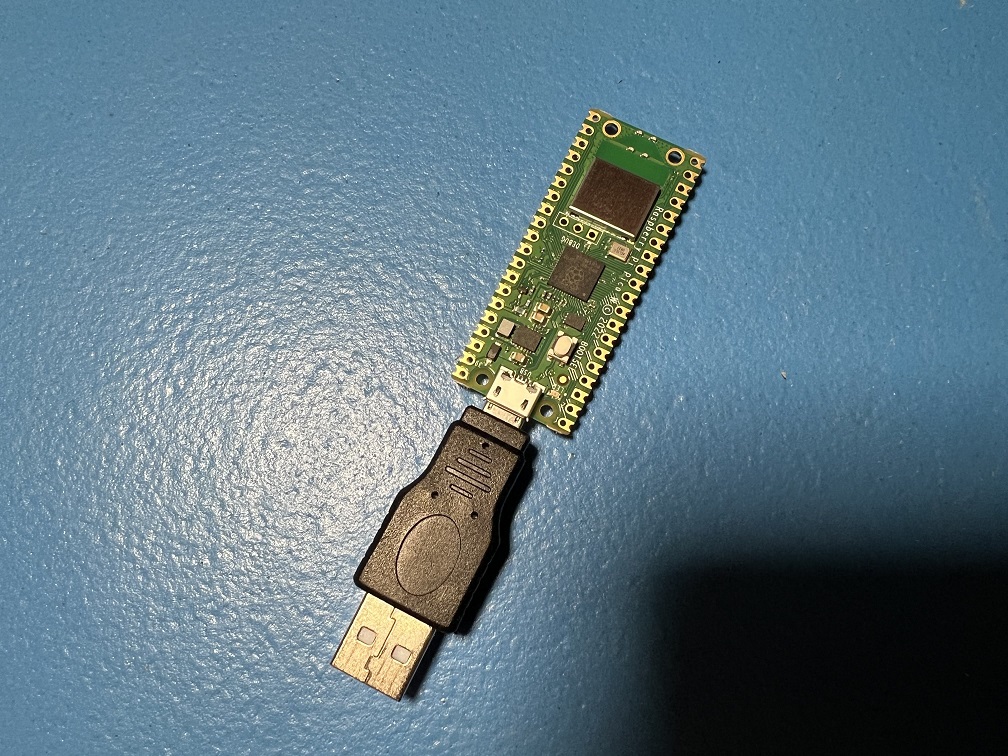
ESP32 Supported Controllers: - NS1: Wireless Pro Controller - NS1: Wireless Left Joycon - NS1: Wireless Right Joycon The ESP32 is a microcontroller that supports Bluetooth. It is one of the few microcontrollers that supports Bluetooth Classic (BTC) since the world has moved onto Bluetooth LE (BLE). Thus it is (almost) uniquely suited to implement the Switch 1 wireless controllers which are also BTC. The USB port on it is a built-in UART intended for debugging, but we hijack it as the main line of communication with CC to eliminate the need for an external UART. This makes it super convenient since a single USB adapter turns it into fully wireless dongle that allows your computer full control of your Switch without the hassle of any cables at all. It's worth noting that the ESP32 also supports BLE. However it only supports BLE 4.2 while the Switch 2 wireless controllers are BLE 5.2. So it's unlikely the ESP32 can do the Switch 2 wireless controllers. |
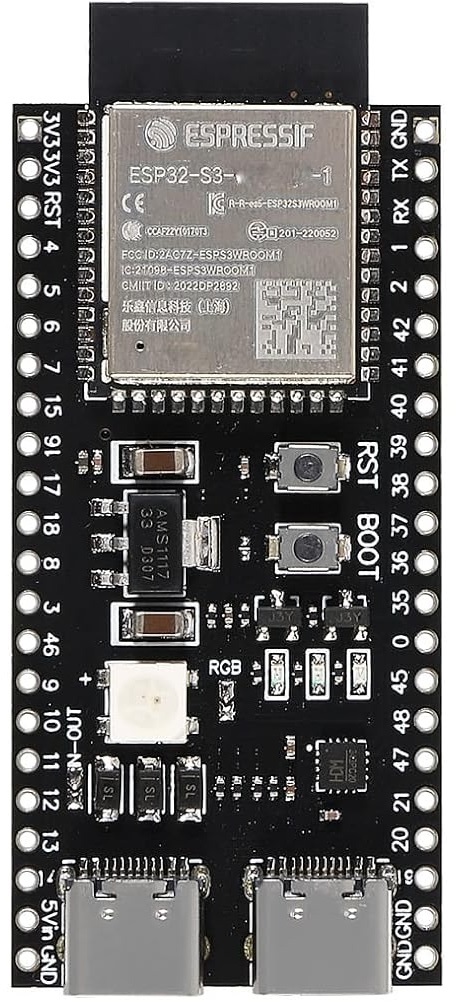 |
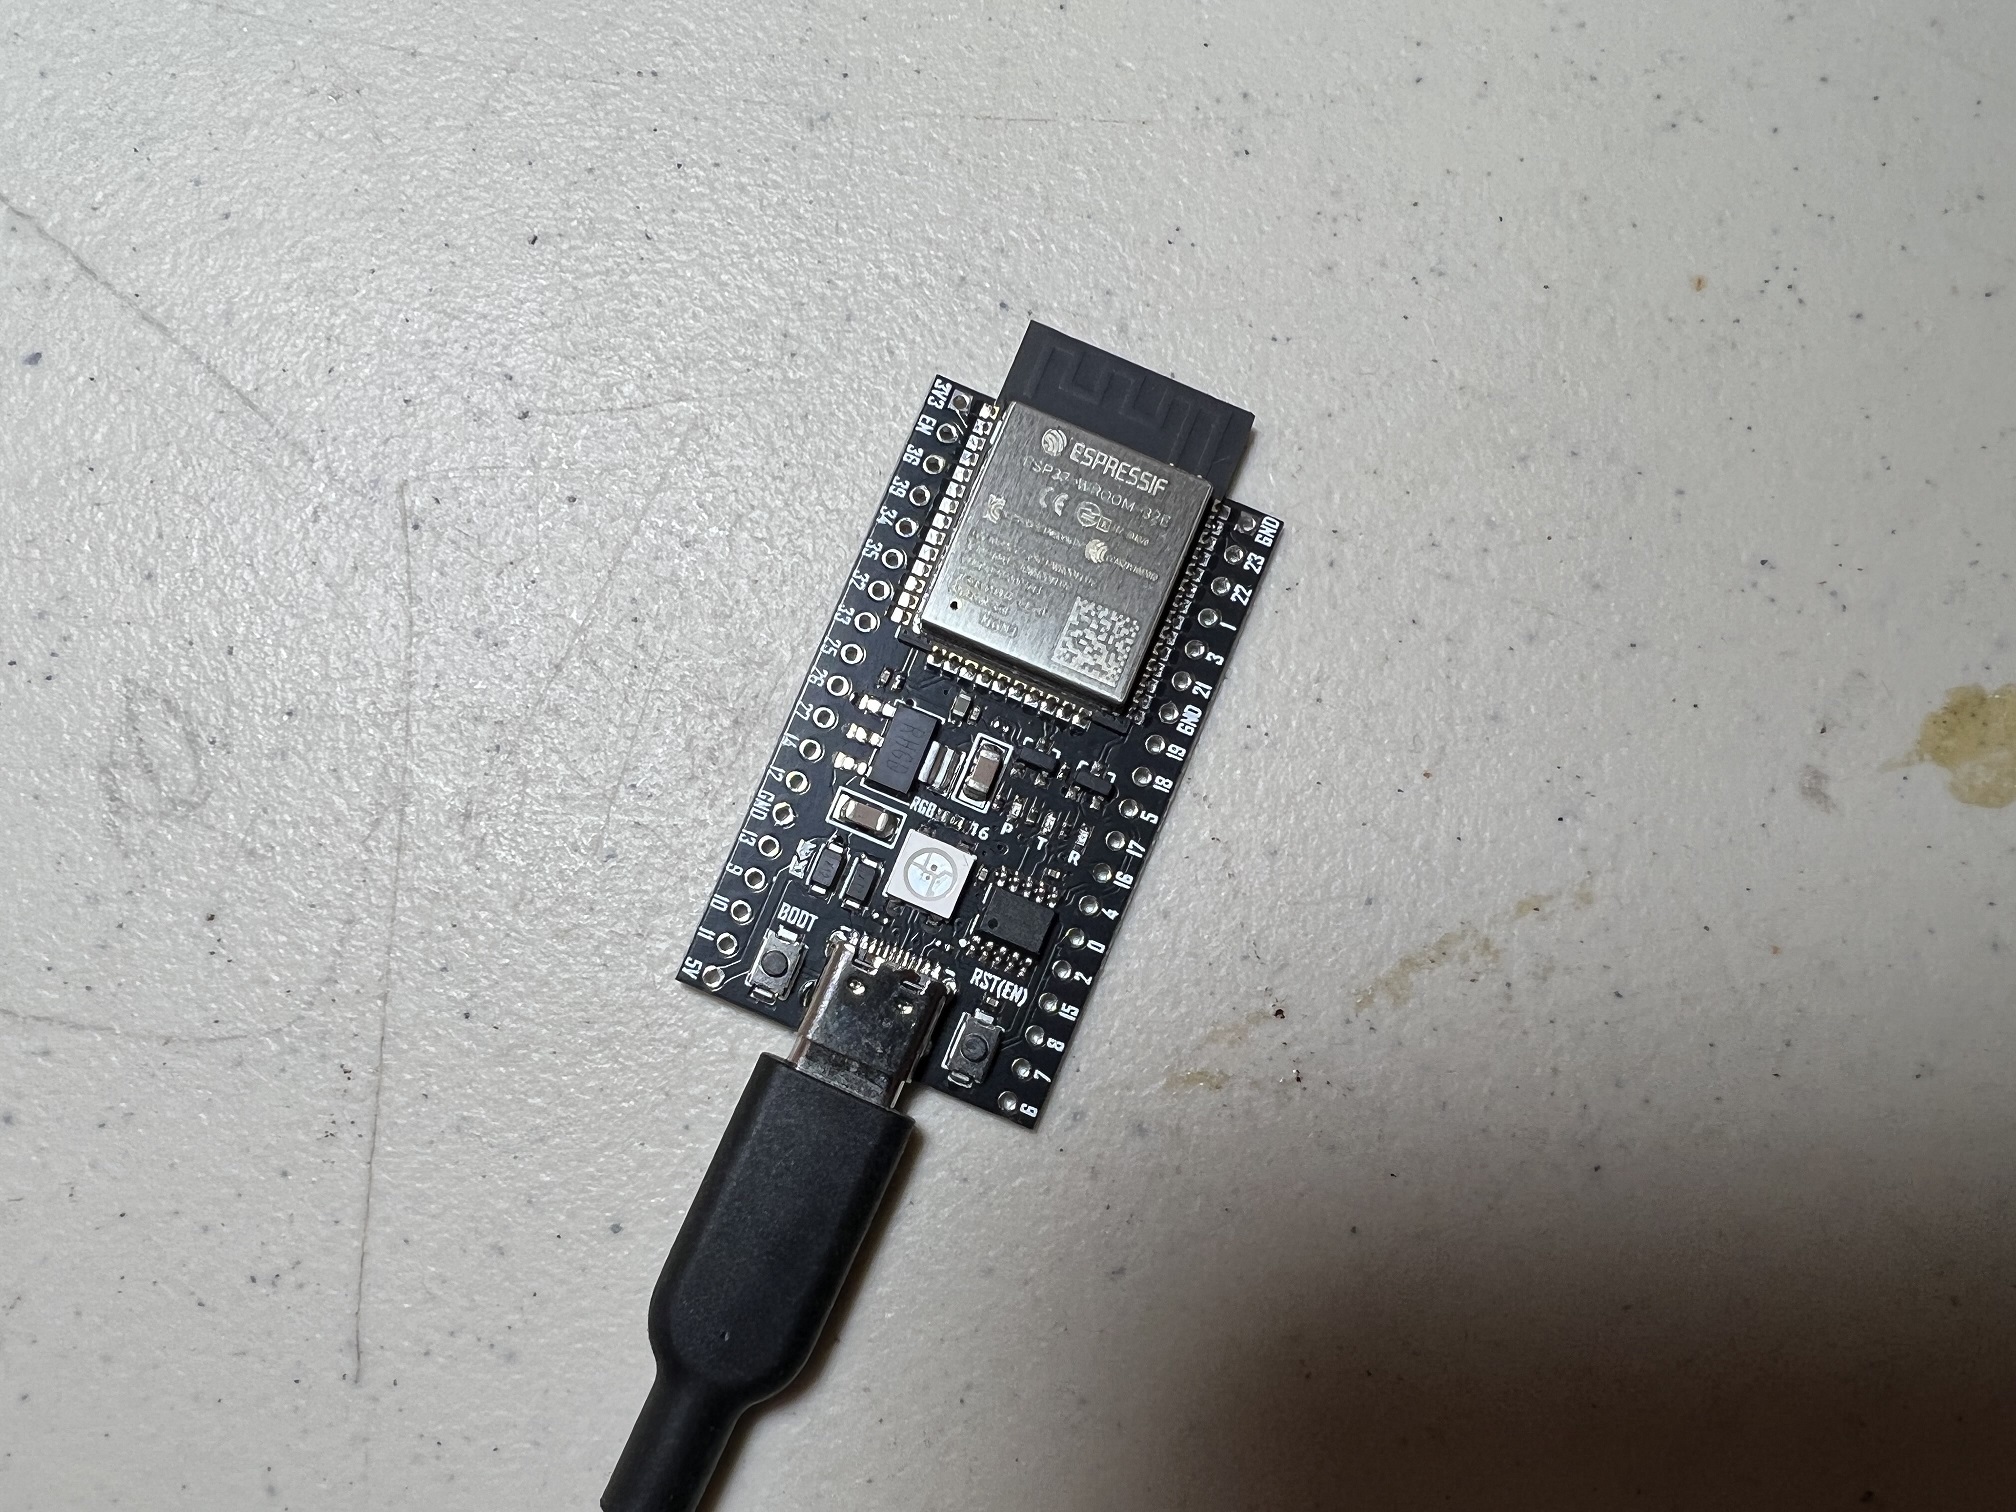
ESP32-S3 Supported Controllers: - HID: Keyboard - NS1: Wired controller - NS2: Wired controller - NS1: Wired Pro Controller - NS1: Wired Left Joycon - NS1: Wired Right Joycon The ESP32-S3 is the by far the best wired controller setup. It has both USB OTG and USB UART as separate ports. The USB OTG can be programmed as a game controller while the USB UART elminates the need for the external UART that was needed by the AVR8 setups (Arduino/Teensy). Thus ESP32-S3 is the perfect replacement for those older setups. Ease of setup is very important as it lowers the technical bar of entry for new users. The ESP32-S3 also supports Bluetooth, but only Bluetooth LE (BLE). So while it cannot implement the Switch 1 wireless controllers, it does give us future ambitions of supporting the Switch 2 wireless controllers. |
Pico W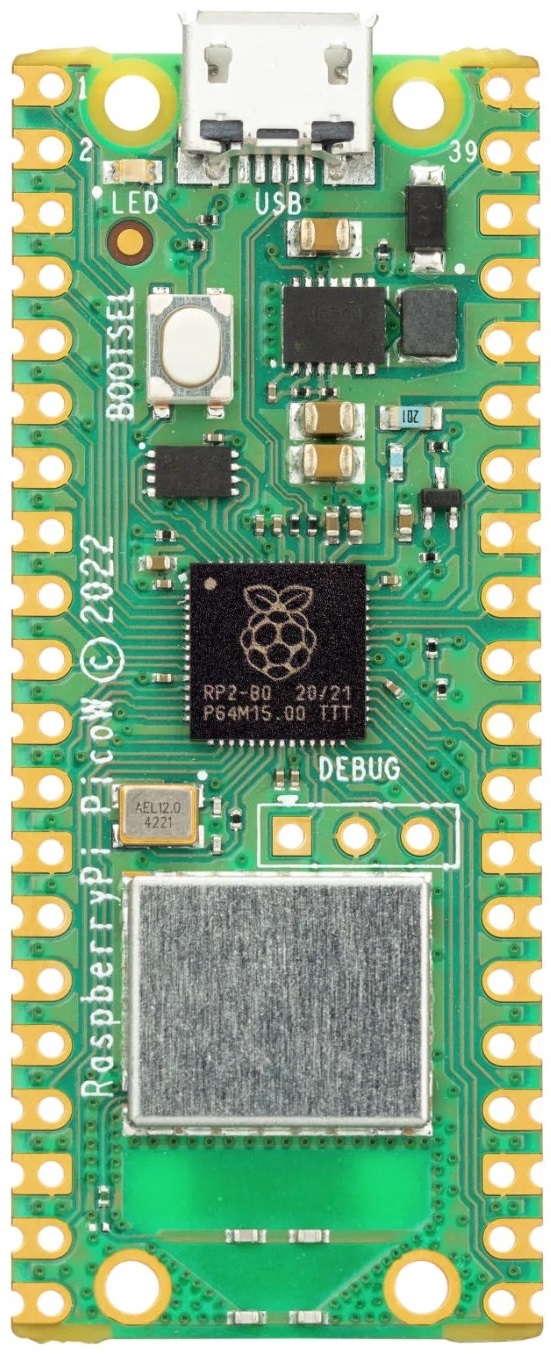 Pico 2 W  |
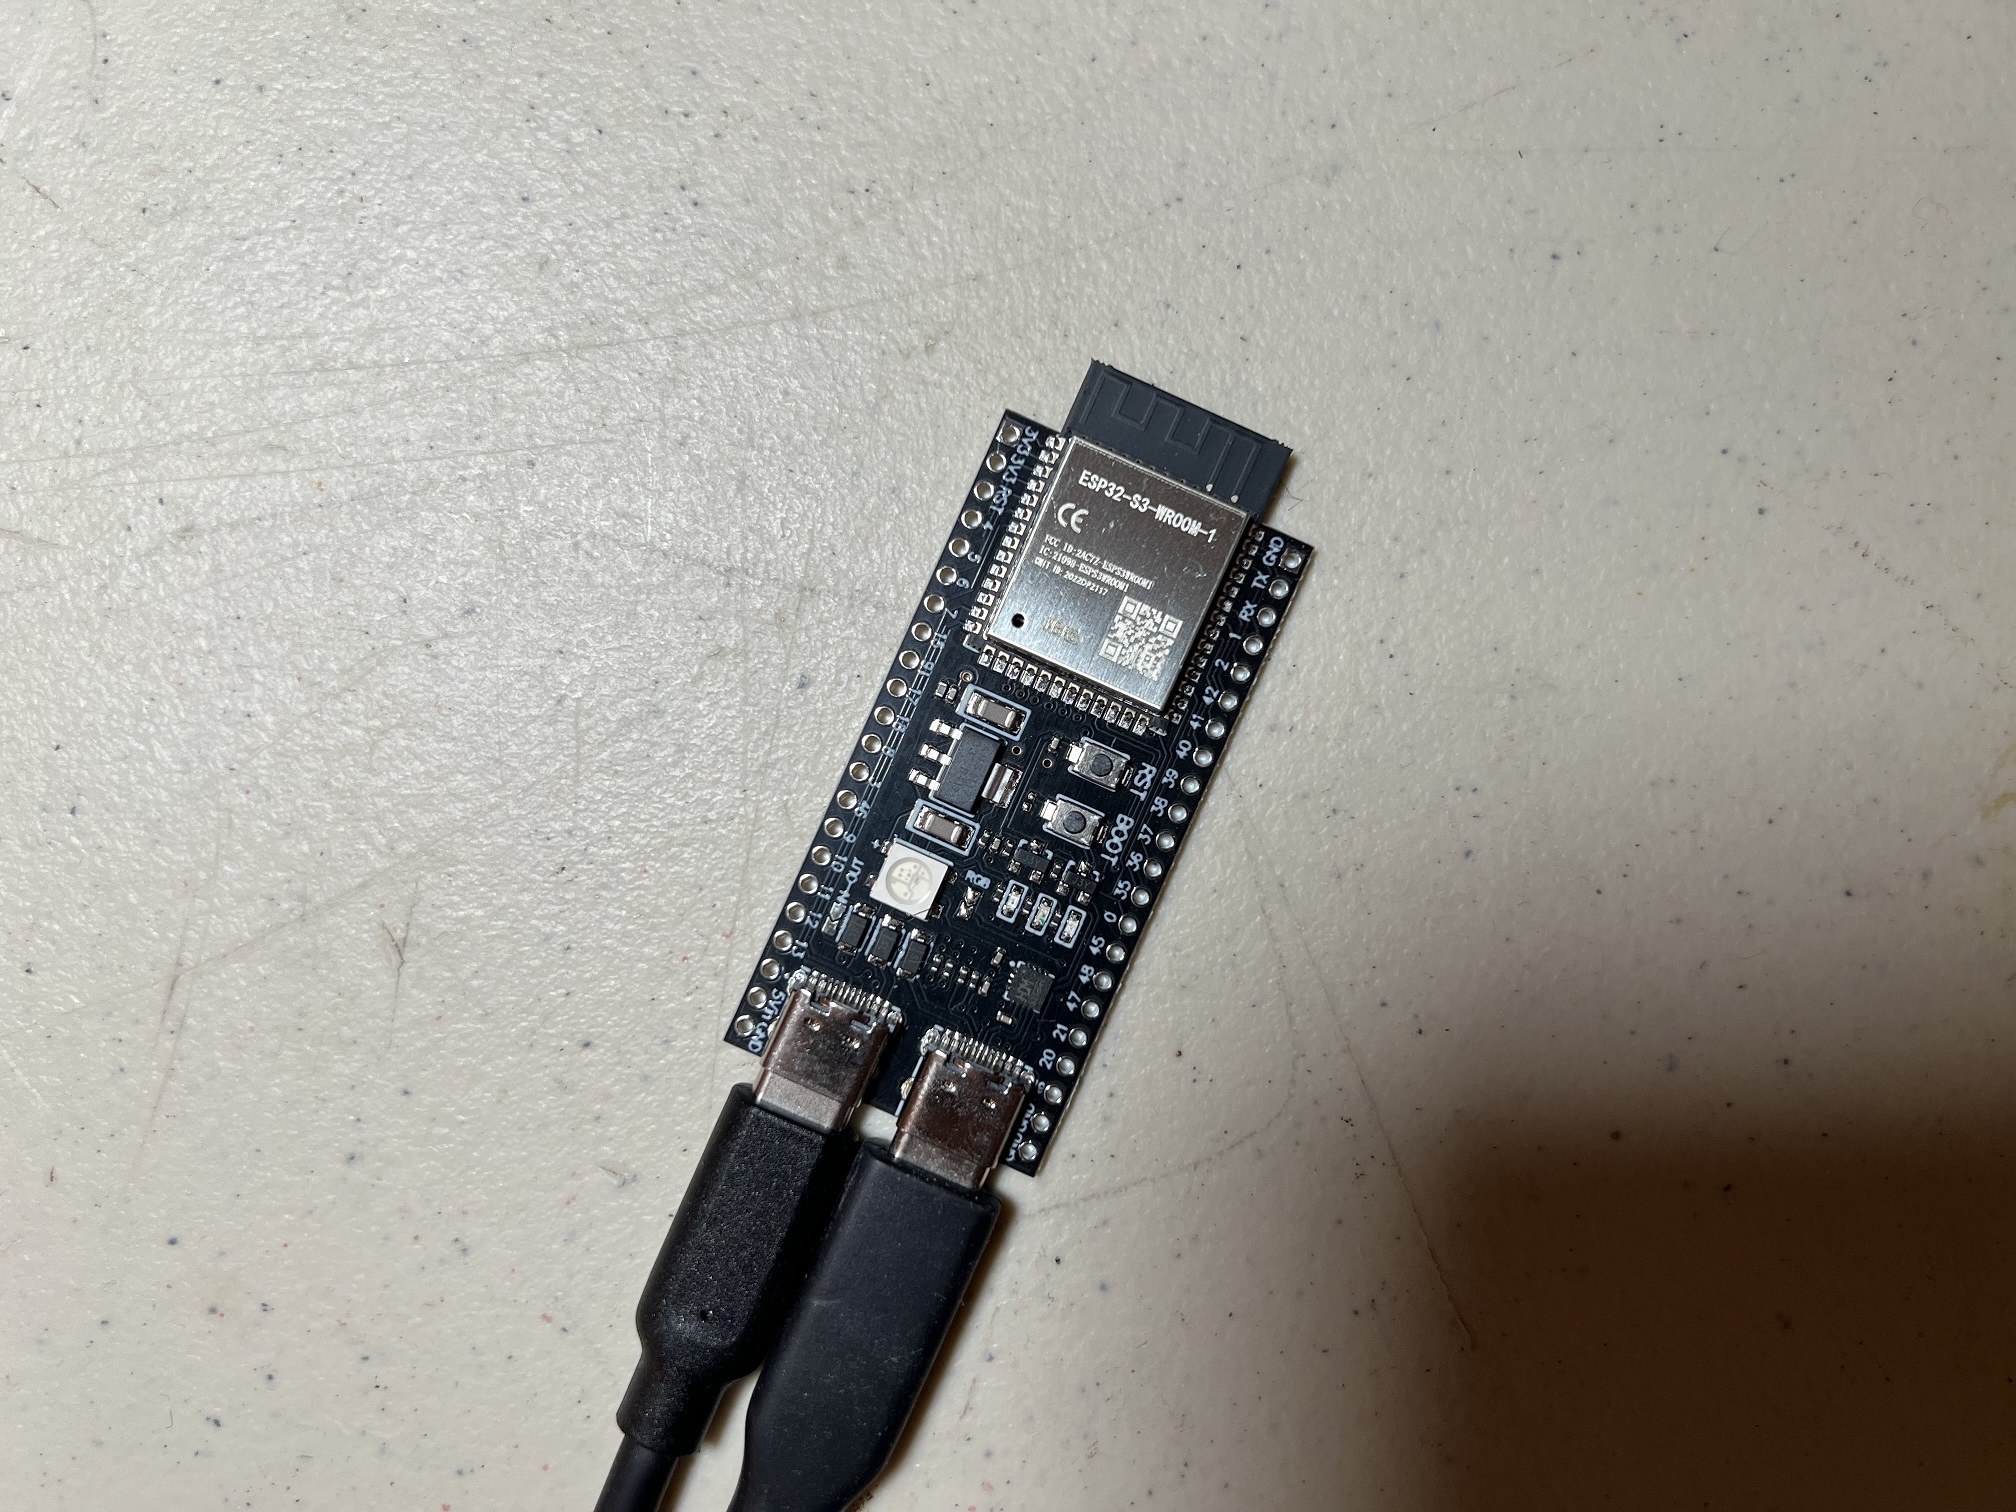
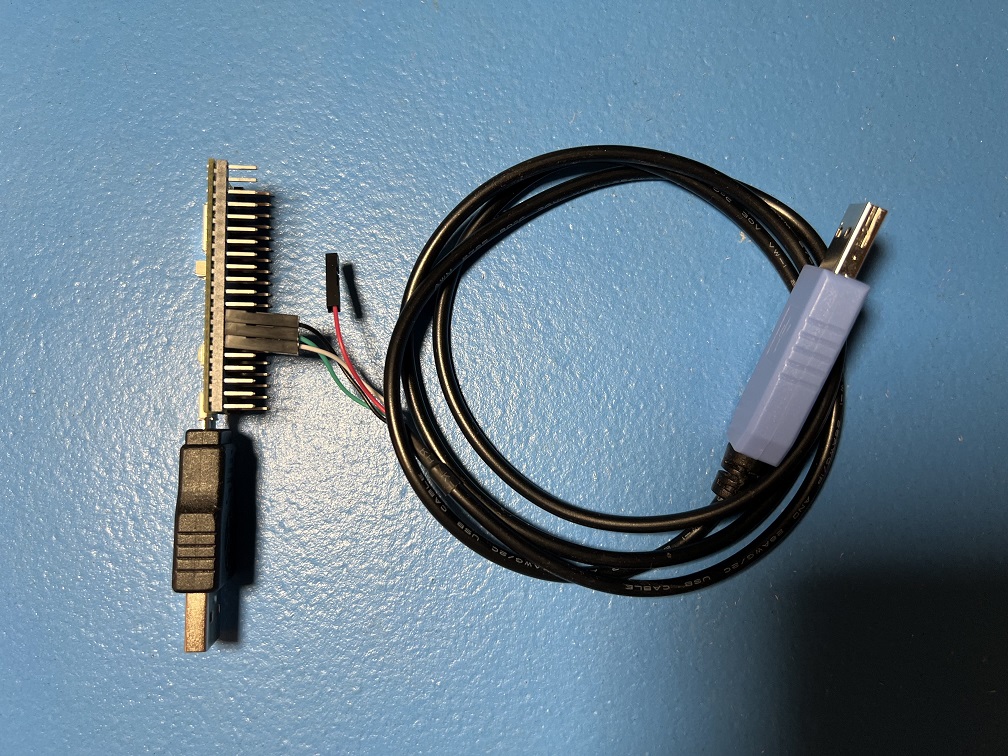
Raspberry Pi: Pico W and Pico 2 W Supported Controllers: - HID: Keyboard - NS1: Wired Controller - NS2: Wired Controller - NS1: Wired Pro Controller - NS1: Wired Left Joycon - NS1: Wired Right Joycon - NS1: Wireless Pro Controller - NS1: Wireless Left Joycon - NS1: Wireless Right Joycon The Raspberry Pi Pico W is unique in that it can support every single controller. However, accessing the wired controllers is more difficult as it requires more setup. The large (silver) chip is a Bluetooth module that supports both BTC and BLE. This allows it to implement wireless controllers. Meanwhile, the USB port on it is USB OTG which allows it to implement the wired controllers. But unlike the ESP32-S3, it does not have a 2nd USB port to use as a UART connection to the computer. Therefore we have programmed two operating modes for the Pico W: - USB Mode - UART Mode In USB mode, the USB port acts as a serial port that can be plugged directly into the computer. This makes it functionally the same as the ESP32 with only wireless controller support. In UART mode, the USB port becomes a wired controller plugged into the console. This unlocks all the remaining (wired) controllers. However, you need to wire up an external UART to UART1 in order for it to communicate with the computer. Thus this setup is similar to that of the Teensy 2 and Pro Micro with the added bonus of the wireless controller support. Both operating modes use the same firmware binary. On boot, it starts in USB mode. It automatically switches to UART mode when it sees valid traffic on UART1. Raspberry Pi: Pico and Pico 2 Supported Controllers: - HID: Keyboard - NS1: Wired Controller - NS2: Wired Controller - NS1: Wired Pro Controller - NS1: Wired Left Joycon - NS1: Wired Right Joycon Same as the Pico W and Pico 2 W, but without the wireless. So UART mode with an external UART is required. Given the price difference of only $2 between wireless and non-wireless, there is no point in using the non-wireless Picos unless you already have one lying around. The same firmware is used as the wireless versions. The firmware will detect the existence of the wireless chip and present only the usable controllers. |
Controller Types
A "controller" (not to be confused with the microcontrollers above) refers to a game controller that will be emulated for the purpose of controlling the game console.
| Image | Description |
|---|---|
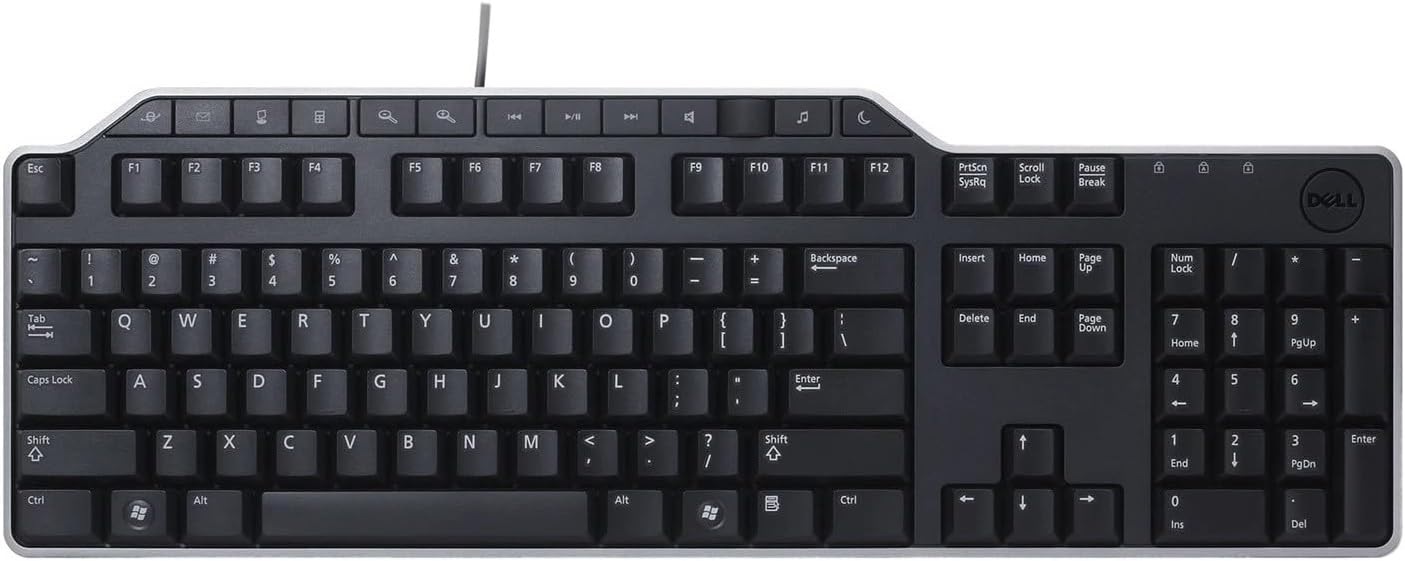 |
HID: Keyboard (Controller Guide) This is a standard HID keyboard over USB. While it can't be used to play a Nintendo Switch, it is useful for typing in text fields. Thus it provides the fastest method for Fast Code Entry. This uses the standard 8-byte HID keyboard report that allows for up to 6 keys to be held at once. |
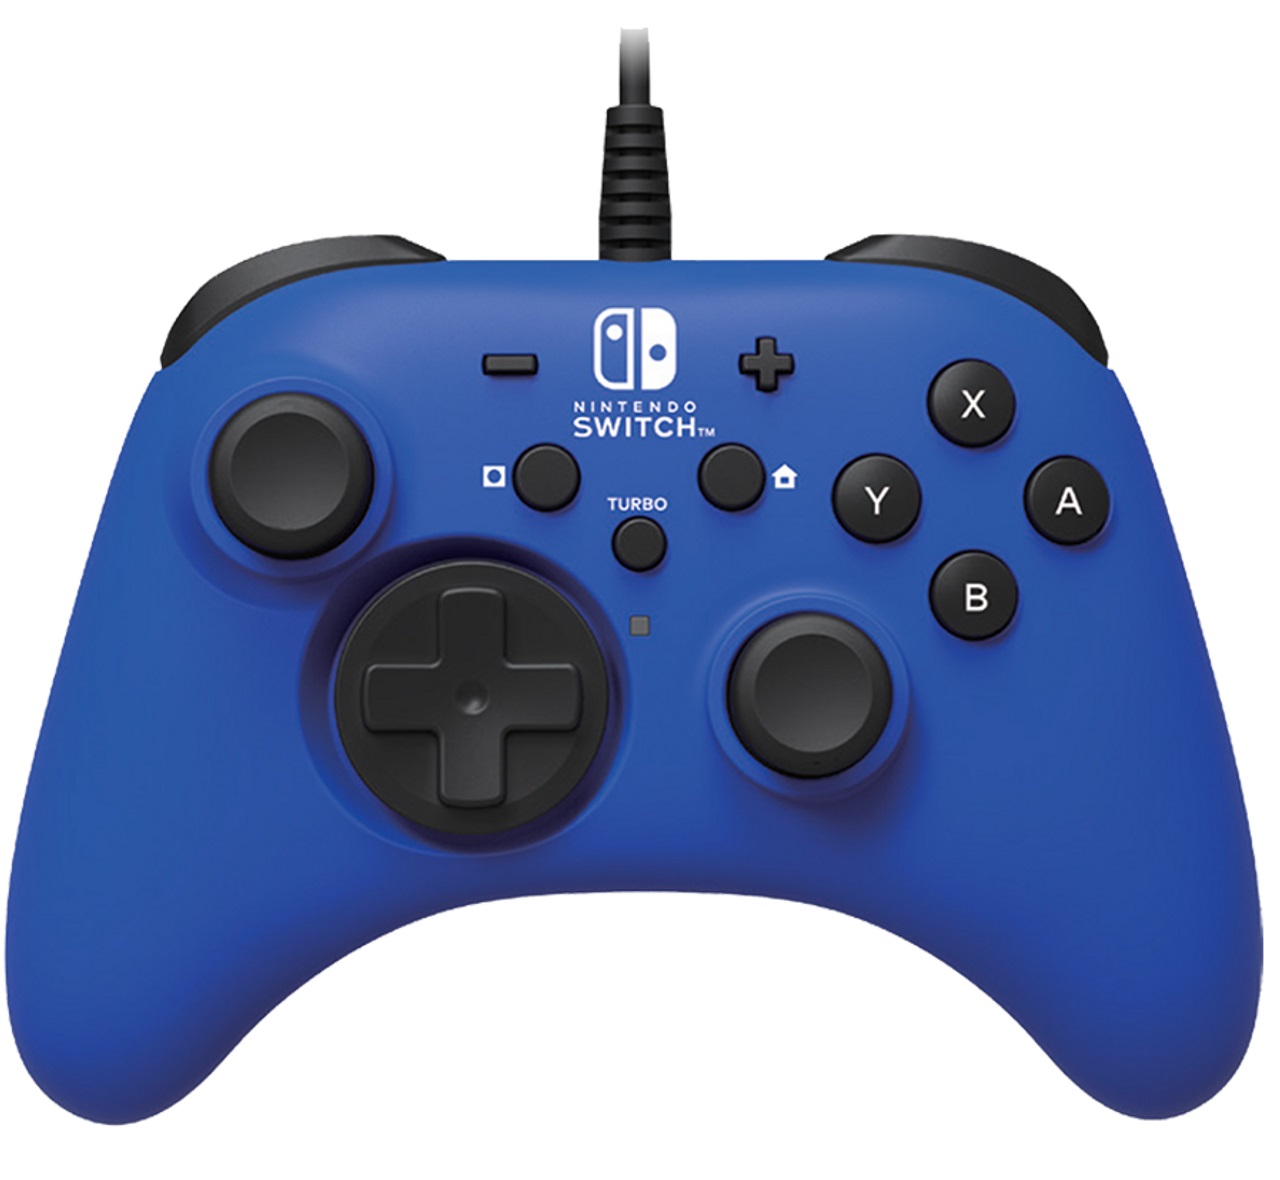 |
Switch 1: Wired Controller (Controller Guide) This is the standard 3rd party "officially licensed" wired controller. Most wired controllers from Horipad and PowerA fall into this category. This controller type only supports the standard buttons/joystick and do not support rumble or gyro. It also does not support custom colors in its icon when connected to the Switch. These use the standard 8-byte HID report type with 14 buttons, a dpad, and two joysticks with 8-bit precision. |
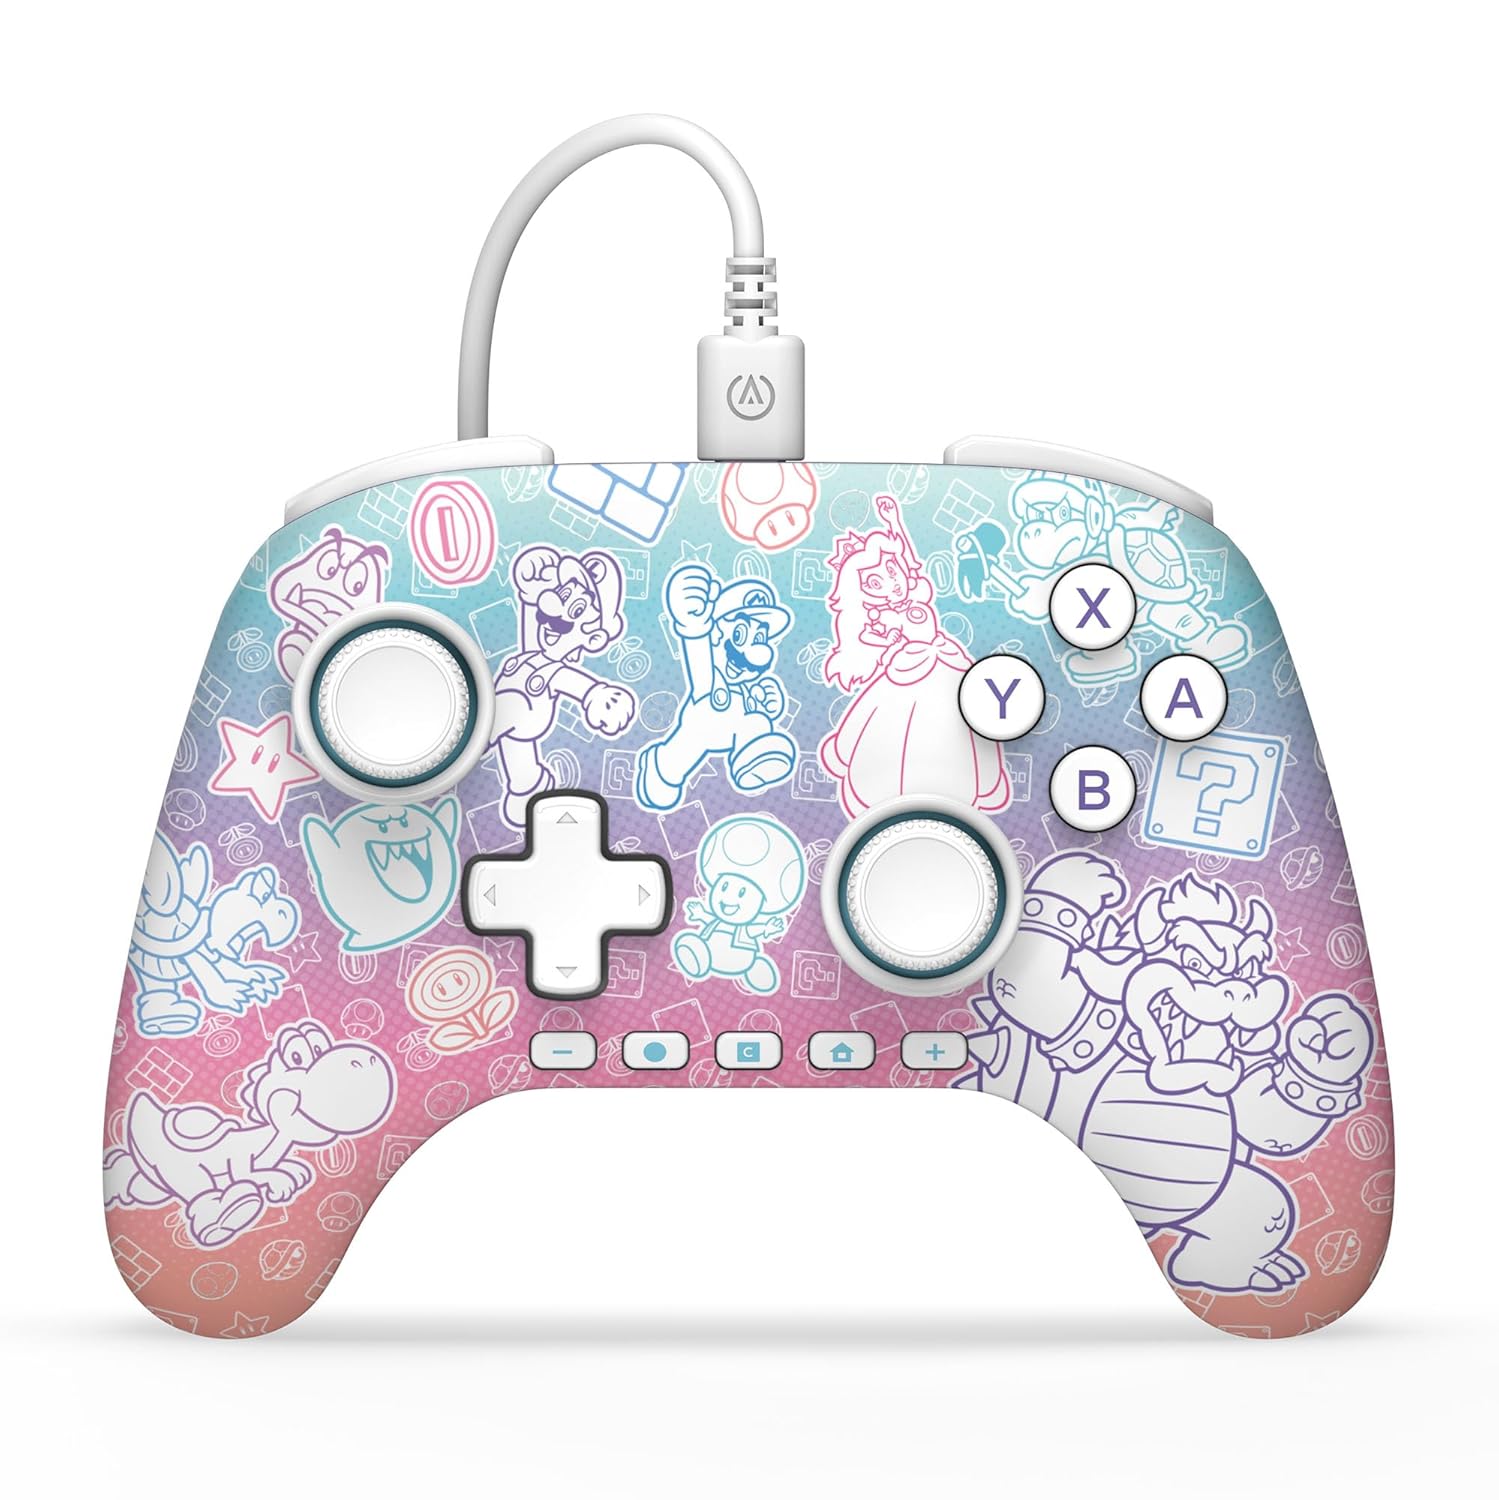 |
Switch 2: Wired Controller (Controller Guide) This is the same as the Switch 1 wired controller, except that they add the GL, GR, and C (gamechat) buttons for the Switch 2. This controller type is backwards compatible with the Switch 1 such that pressing the new buttons simply do nothing on the Switch 1. These also use the standard 8-byte HID report type with 17 buttons, a dpad, and two joysticks with 8-bit precision. Due to the button field having only 16 bits, the 17'th button (the C button) instead uses an unused bit in the dpad byte. |
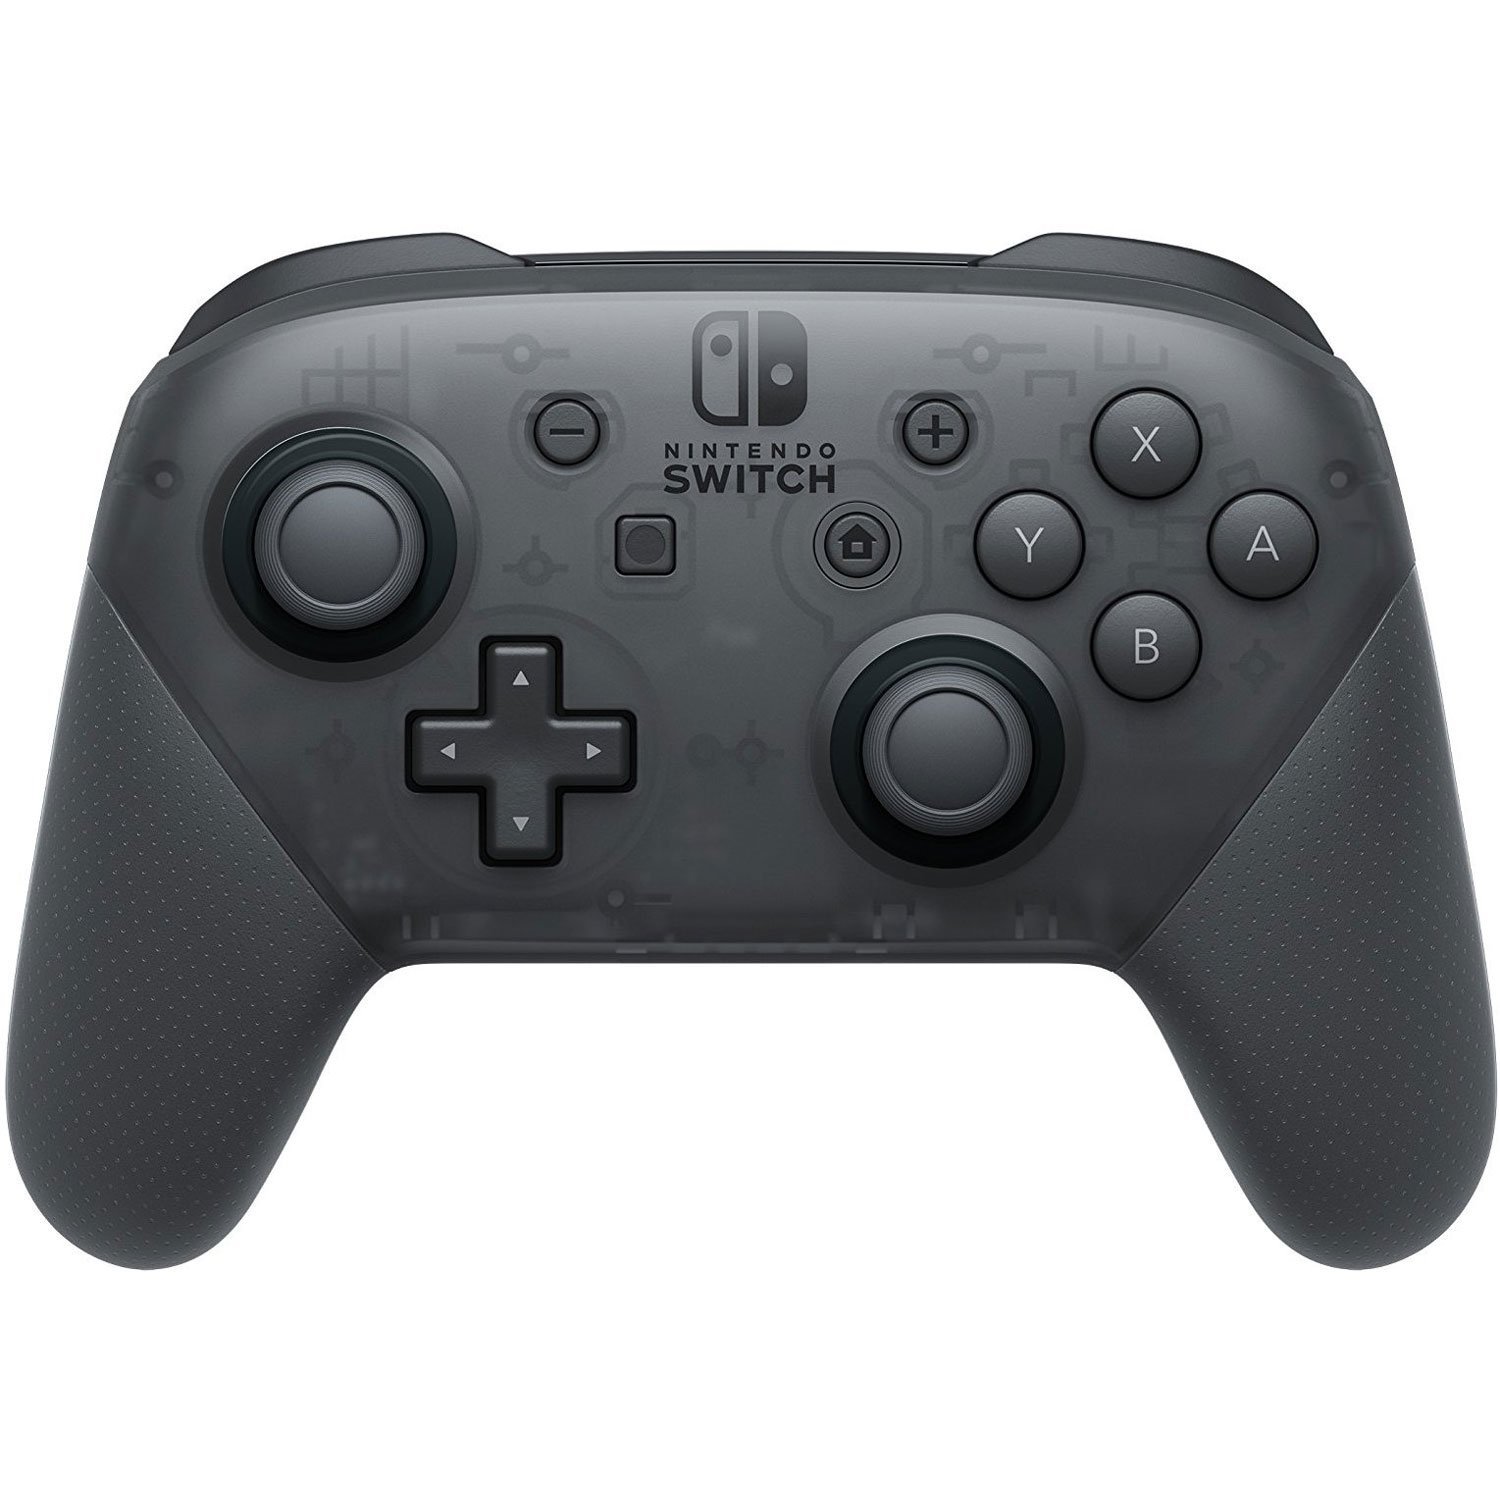 |
Switch 1: Wired/Wireless Pro Controller (Controller Guide: Wired/Wireless) This is the official pro controller from Nintendo. In addition to all the features of the 3rd party wired controllers above, it also supports gyro, rumble, NFC, console wake up, and custom icon colors. (Though we currently only support rumble and console colors.) This controller exists in two variants, wired and wireless. Wireless is supported by the ESP32 and the Pico W. Wired is supported by the ESP32-S3, Pico (UART mode only), and sys-botbase. This controller uses Nintendo's proprietary 48-byte HID report 0x30. |
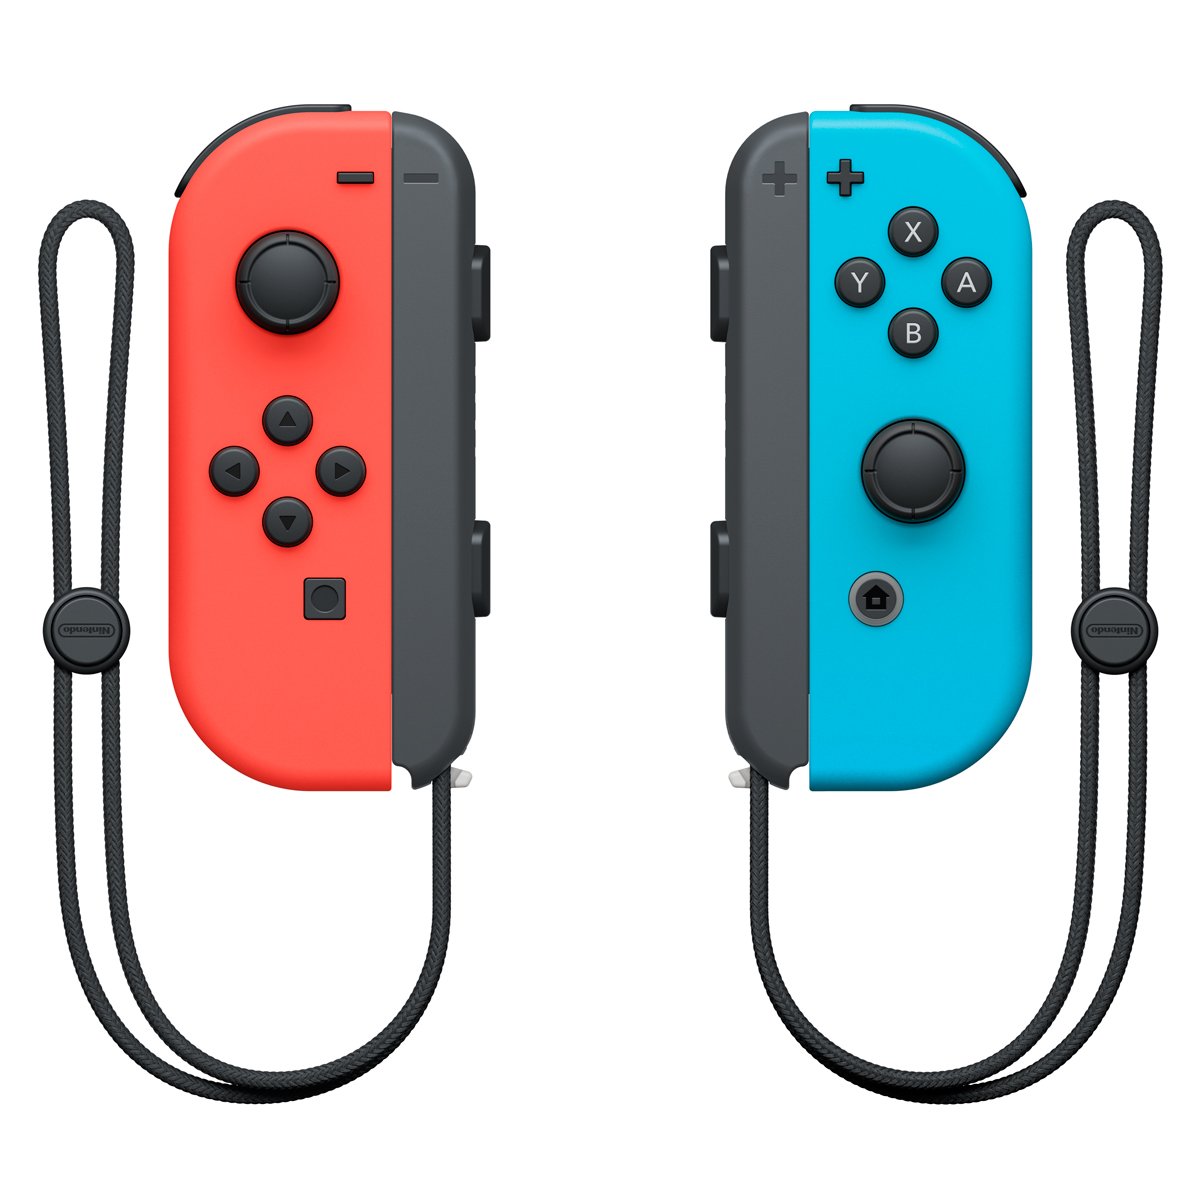 |
Switch 1: Wired/Wireless Joycons (Controller Guide: Wired/Wireless) These are the official joycons from Nintendo and supports the same set of features as the Pro Controller (minus fewer buttons/joysticks). Joycons are important to this project because they are required for some games such as Pokémon Let's Go Pikachu and Eevee (LGPE). While wired joycons do not (officially) exist, the protocol for it does. Thus joycons can also be either wired or wireless. Wireless is supported by the ESP32 and Pico W controllers. Wired is supported by the ESP32-S3 and Pico (UART mode only). These use Nintendo's proprietary 48-byte HID report 0x30. |
Controller Performance Classes
For the purposes of program compatibility, each setup/device + controller combination is placed into one of 2 performance categories:
- Wired
- Wireless
Programs that are speed-critical will have separate execution paths optimized for each performance category. (i.e. date spam, Fast Code Entry...)
Wired:
Wired controllers are by far the most stable with a button timing accuracy of < 1ms (typically ~100us). They are not prone to random disconnects and can connect to the Switch from almost anywhere. This makes them the best suited for automation.
| Device | Controller |
|---|---|
| ESP32-S3 Pico 1 W (UART mode) Pico 2 W (UART mode) RP2040 Family RP2350 Family |
HID: Keyboard NS1: Wired Controller NS2: Wired Controller NS1: Wired Pro Controller NS1: Wired Left Joycon NS1: Wired Right Joycon |
| sys-botbase 3 (sbb3) | NS1: Wired Controller |
Wireless:
Wireless controllers are less stable and usually have timing variation on the order of 2-10ms. While they are clean and easy to setup with no additional cabling, wireless controllers are generally less reliable since they are prone to random disconnects and high latencies from wireless interference. Nintendo's complicated (and proprietary) wireless protocol means that 3rd party implementations (including this project) are typically less than perfect and prone to compatibility issues.
While wired controllers are better for permanent setups due to their reliability, wireless does have a place for frequent travelers as well as first-time users due to ease of setup.
| Device | Controller |
|---|---|
| ESP32 Pico 1 W (both modes) Pico 2 W (both modes) |
NS1: Wireless Pro Controller NS1: Wireless Left Joycon NS1: Wireless Right Joycon |
Discord Server:
