Arduino Uno R3 (discontinued)
This setup is no longer supported. Please pick something from the recommended list.
This file remains for historical/reference purposes.
The wired controller setup is the most difficult of the setups. Most of you who joined us prior to 2025 will be familiar with this setup.
This version of the wired controller setup uses the Arduino Leonardo. The hardware setup is visually identical to the Leonardo, but the firmware installation is completely different.
The Arduino Uno R3 is the legacy setup that we support only because we (barely*) still can. If you already one, then use this guide. If not, go buy an Arduino Leonardo instead.
The problem with the Uno R3 is that the ATmega16U2 USB chip has so little memory that is has caused us numerous problems in the past. While we have mostly mitigated these issues, we cannot guarantee that they will return in the future.
Hardware Setup:
Required Hardware (Full List):
- A regular Nintendo Switch and its accessories (dock, power cable, HDMI cable). (You cannot use a Switch Lite.)
- A computer running x64 Windows. (or another OS if you are able to set it up.)
- A video capture card.
- An Arduino Uno R3.
- A USB-A to USB-B cable.
- USB to Serial TTL (UART)
- Male-Male Jumper Wires
#1-3 are part of the initial setup so you should have all of these already. #4-7 are specific to this controller setup.
Estimated Total Cost (USD): (not including computer and Nintendo Switch)
- Single Setup: $33 - $43
- Bulk Purchase: $29 per setup
Recommended Purchase Links:
Capture Card: See previous section.
Arduino Uno R3:
None. We do not recommend using the Uno R3. If you already have one, then please proceed. If you don't, then go for the Arduino Leonardo instead.
A USB-A to USB-B cable:
These are super common and you probably already have a bunch of them sitting around. Otherwise just google for it.
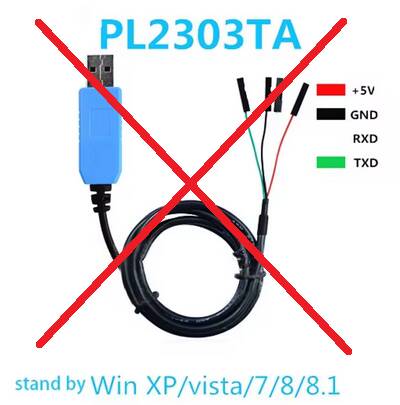
USB to Serial TTL (UART):
There are many options here. The one we recommend (for ease of use) is the Adafruit model:
- https://www.adafruit.com/product/954
- https://www.digikey.com/en/products/detail/adafruit-industries-llc/954/7064488
- https://www.amazon.com/dp/B00DJUHGHI/

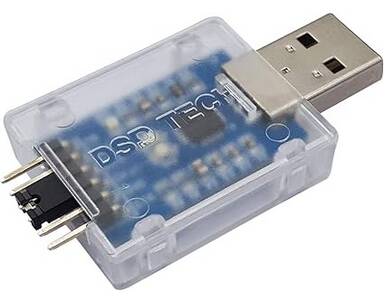
Or you can search for "CP2102" and you'll get tons of hits from various brands/sellers that look like these:
Important:
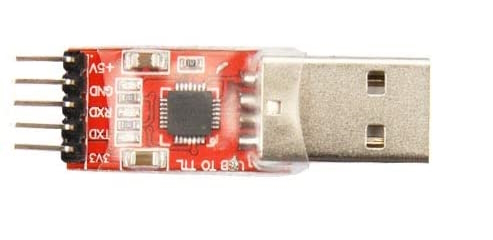
DO NOT get cables with the Prolific controllers. e.g. PL2303 or any other model number. They are cheap, do not work, and they are explicitly blocked in the program. They often look deceptively similar to the Adafruit UART, but they are not the same. If you buy outside of this link, verify it does not use PL controllers. If you buy it anyway, you will be wasting your time and money. YOU HAVE BEEN WARNED!
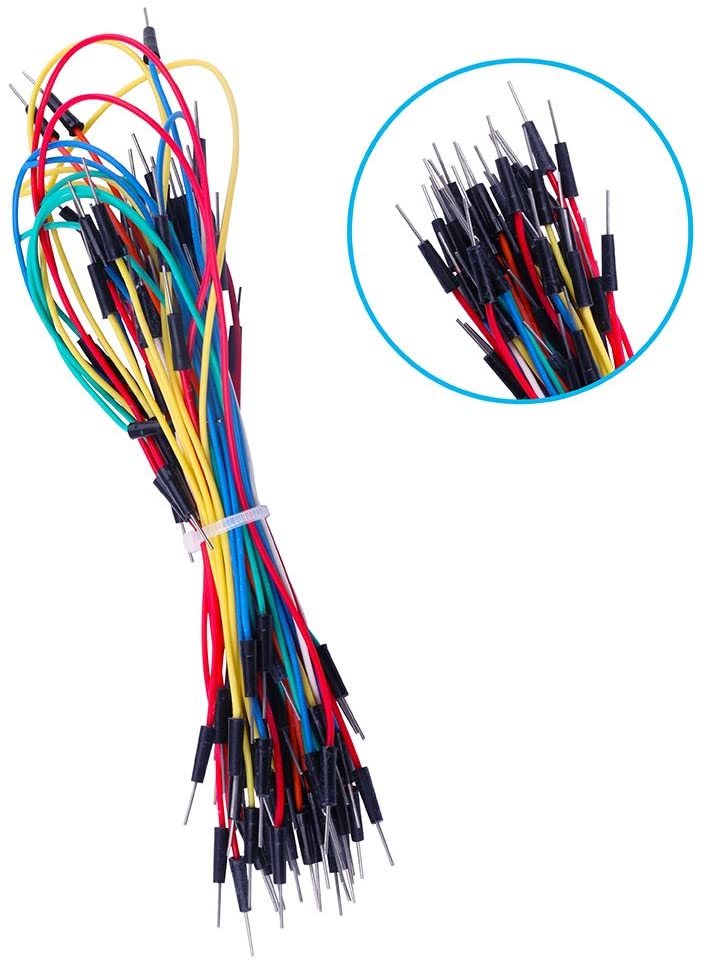
Male-Male Jumper Wires:
- https://www.digikey.com/en/products/detail/twin-industries/TW-MP-10/2116120
- https://www.amazon.com/dp/B07S1NGQR1
If purchasing the items from this list, you will need Male to Male Jumper wires. WARNING: If you do not buy Hardware from this list, you will need to evaluate what you purchased for the correct type of Jumper Wire. e.g. Female-Male jumper wires may be needed instead.
Hardware Assembly:
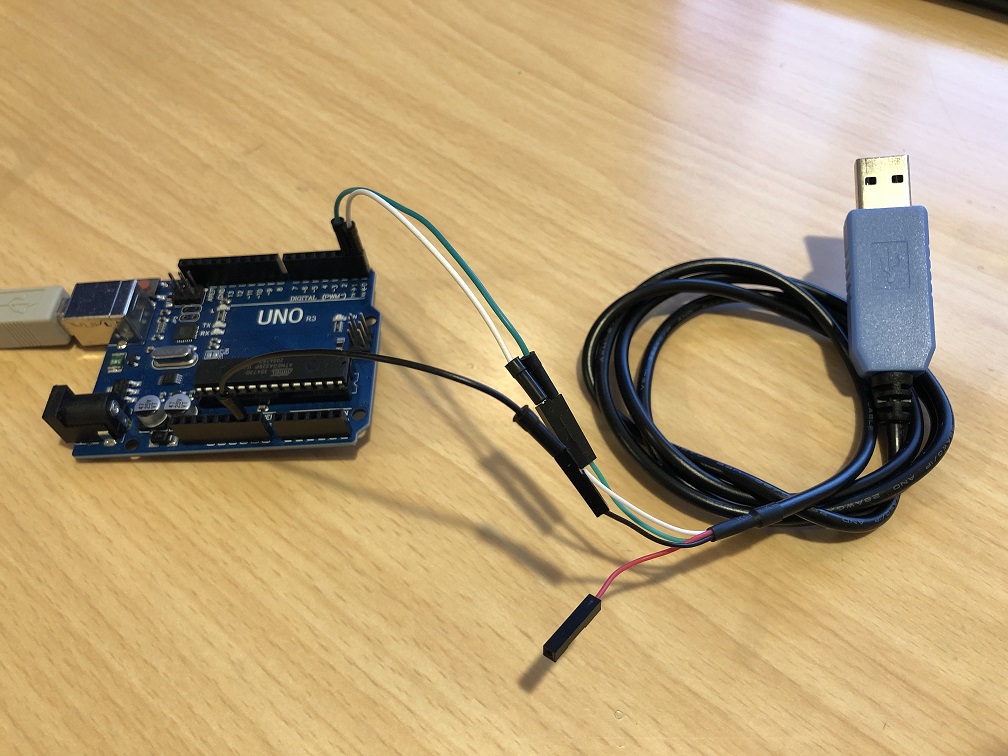
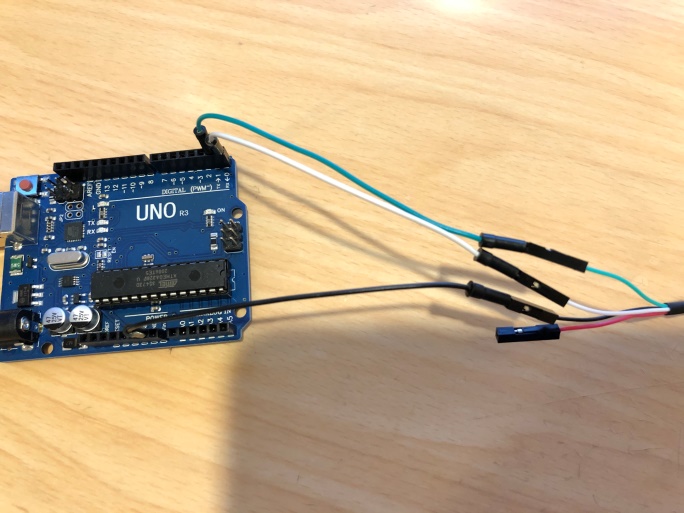
Once you have your hardware, you need to make some connections between your UART cables and the Uno R3. Use the jumper wires you bought to connect the two.
Step 1: Connect UART to the Uno R3
Make the following connections:
| UART pin | Adafruit UART Wire Color | Arduino Leonardo pin |
|---|---|---|
| TX | Green | RX <- 0 (pin0) |
| RX | White | TX -> 1 (pin1) |
| GND | Black | GND (any one is fine) |
| VCC | Red | Leave unconnected |
If you did not buy the Adafruit UART, your wire colors will be different! Refer to your UART's manual or board for the correct pins. Often, with CP210x modules, the pin type is written on the board itself. Also, note that the color of the jumper wires do not matter.
Step 2: Download and install FLIP
Download and install FLIP.
Step 3: Flash PABotBase into your Device.
The root folder of the SerialPrograms package should have a set of .hex files for each of the different devices.
- Run the FLIP program that you downloaded earlier.
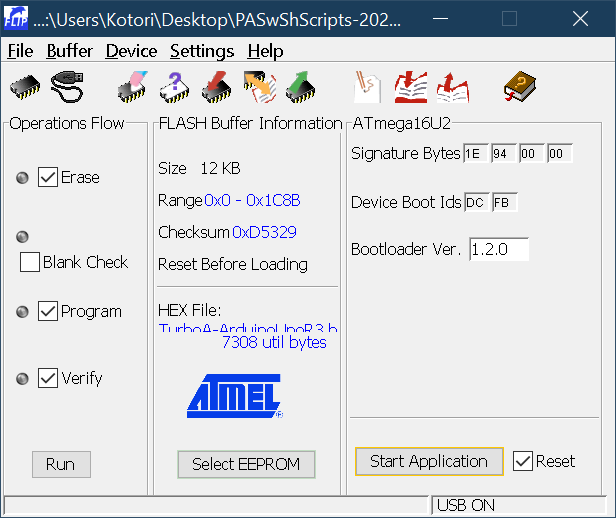
Device->Select. SelectATmega16U2and click OK.-
File->Load HEX File.... Open the .hex namedPABotBase-NS-ArduinoUnoR3-<version>.hex.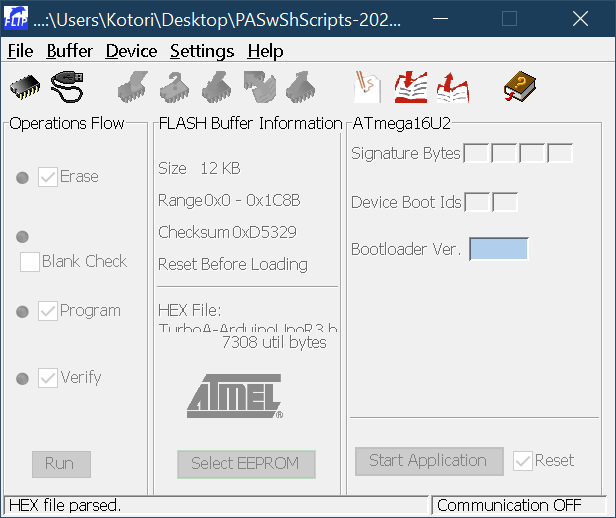
-
Plug the Arduino into your computer.
-
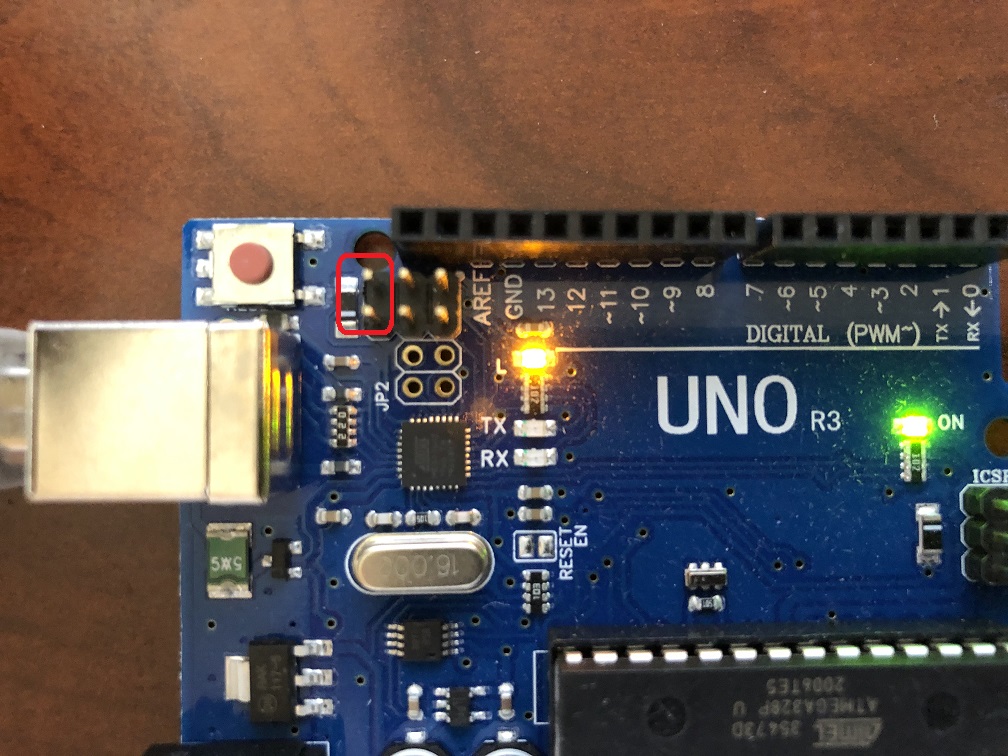
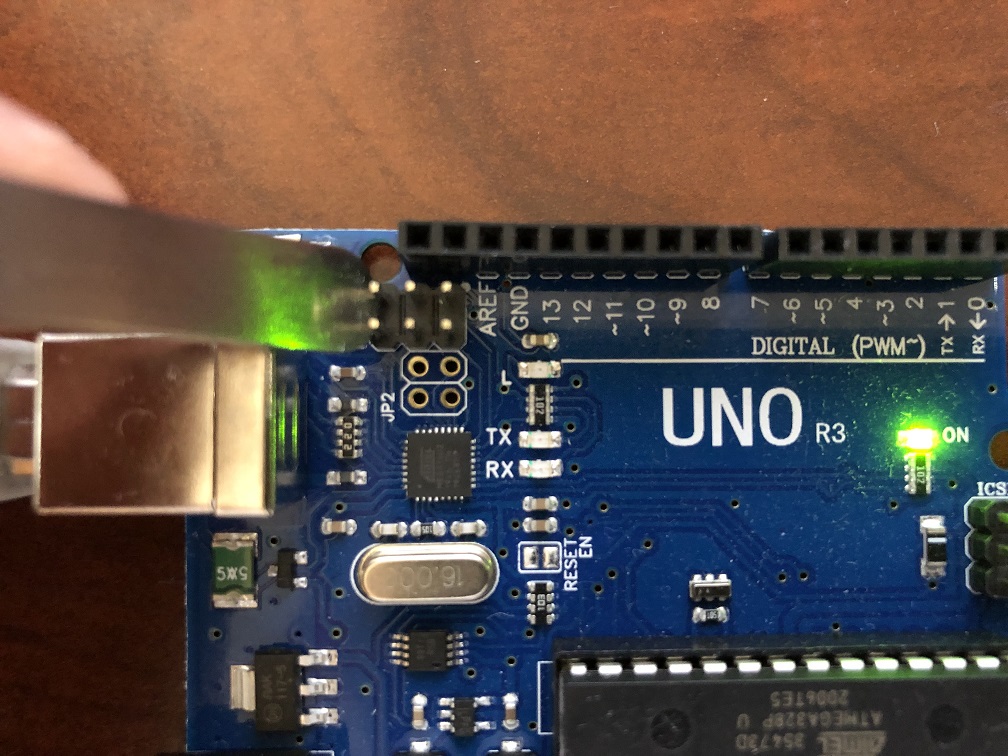
Short the following two pins with a conductive object, then release it. Your computer should play the unplug/plug sound.
-
Click on the USB icon. Select
USBand clickOpen.
If everything worked correctly, it should look like this:
If you get an error, then it usually means one of the following:
- The ATmega16u2 driver hasn't been correctly installed.
- Your Arduino cannot enter DFU mode.
- Your computer allowing the Arduino to enter DFU mode.
If it is #2, then your board is defective and cannot be used to run programs in this package. If it is #3, we still do not know the cause. There are reports that an Arduino works on one computer, but not another.
Many people get stuck at this point if an error occurs.
Debugging this can be tricky as you will need to open up Device Manager to see if the computer recognizes the device. Then you will need to mess with the drivers. We won't go into too much detail on how to debug things at this point. This is one of the major reasons why we are moving away from the Arduino Uno R3.
- Click Run.
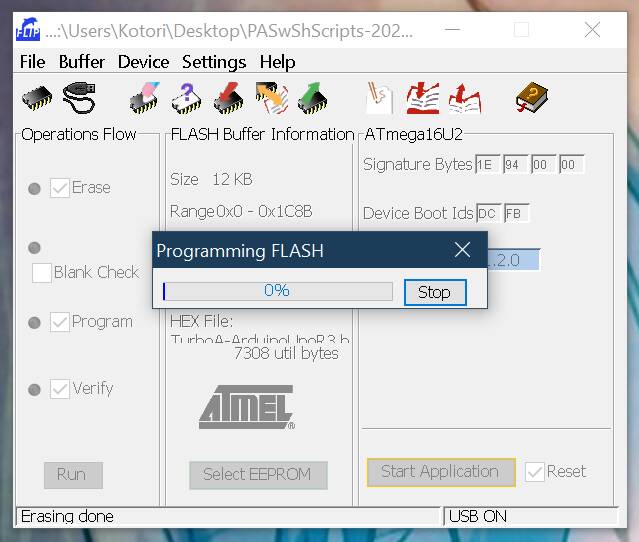
If you see no errors, the you have successfully flashed the program to your Arduino!
- Unplug the Arduino from your computer.
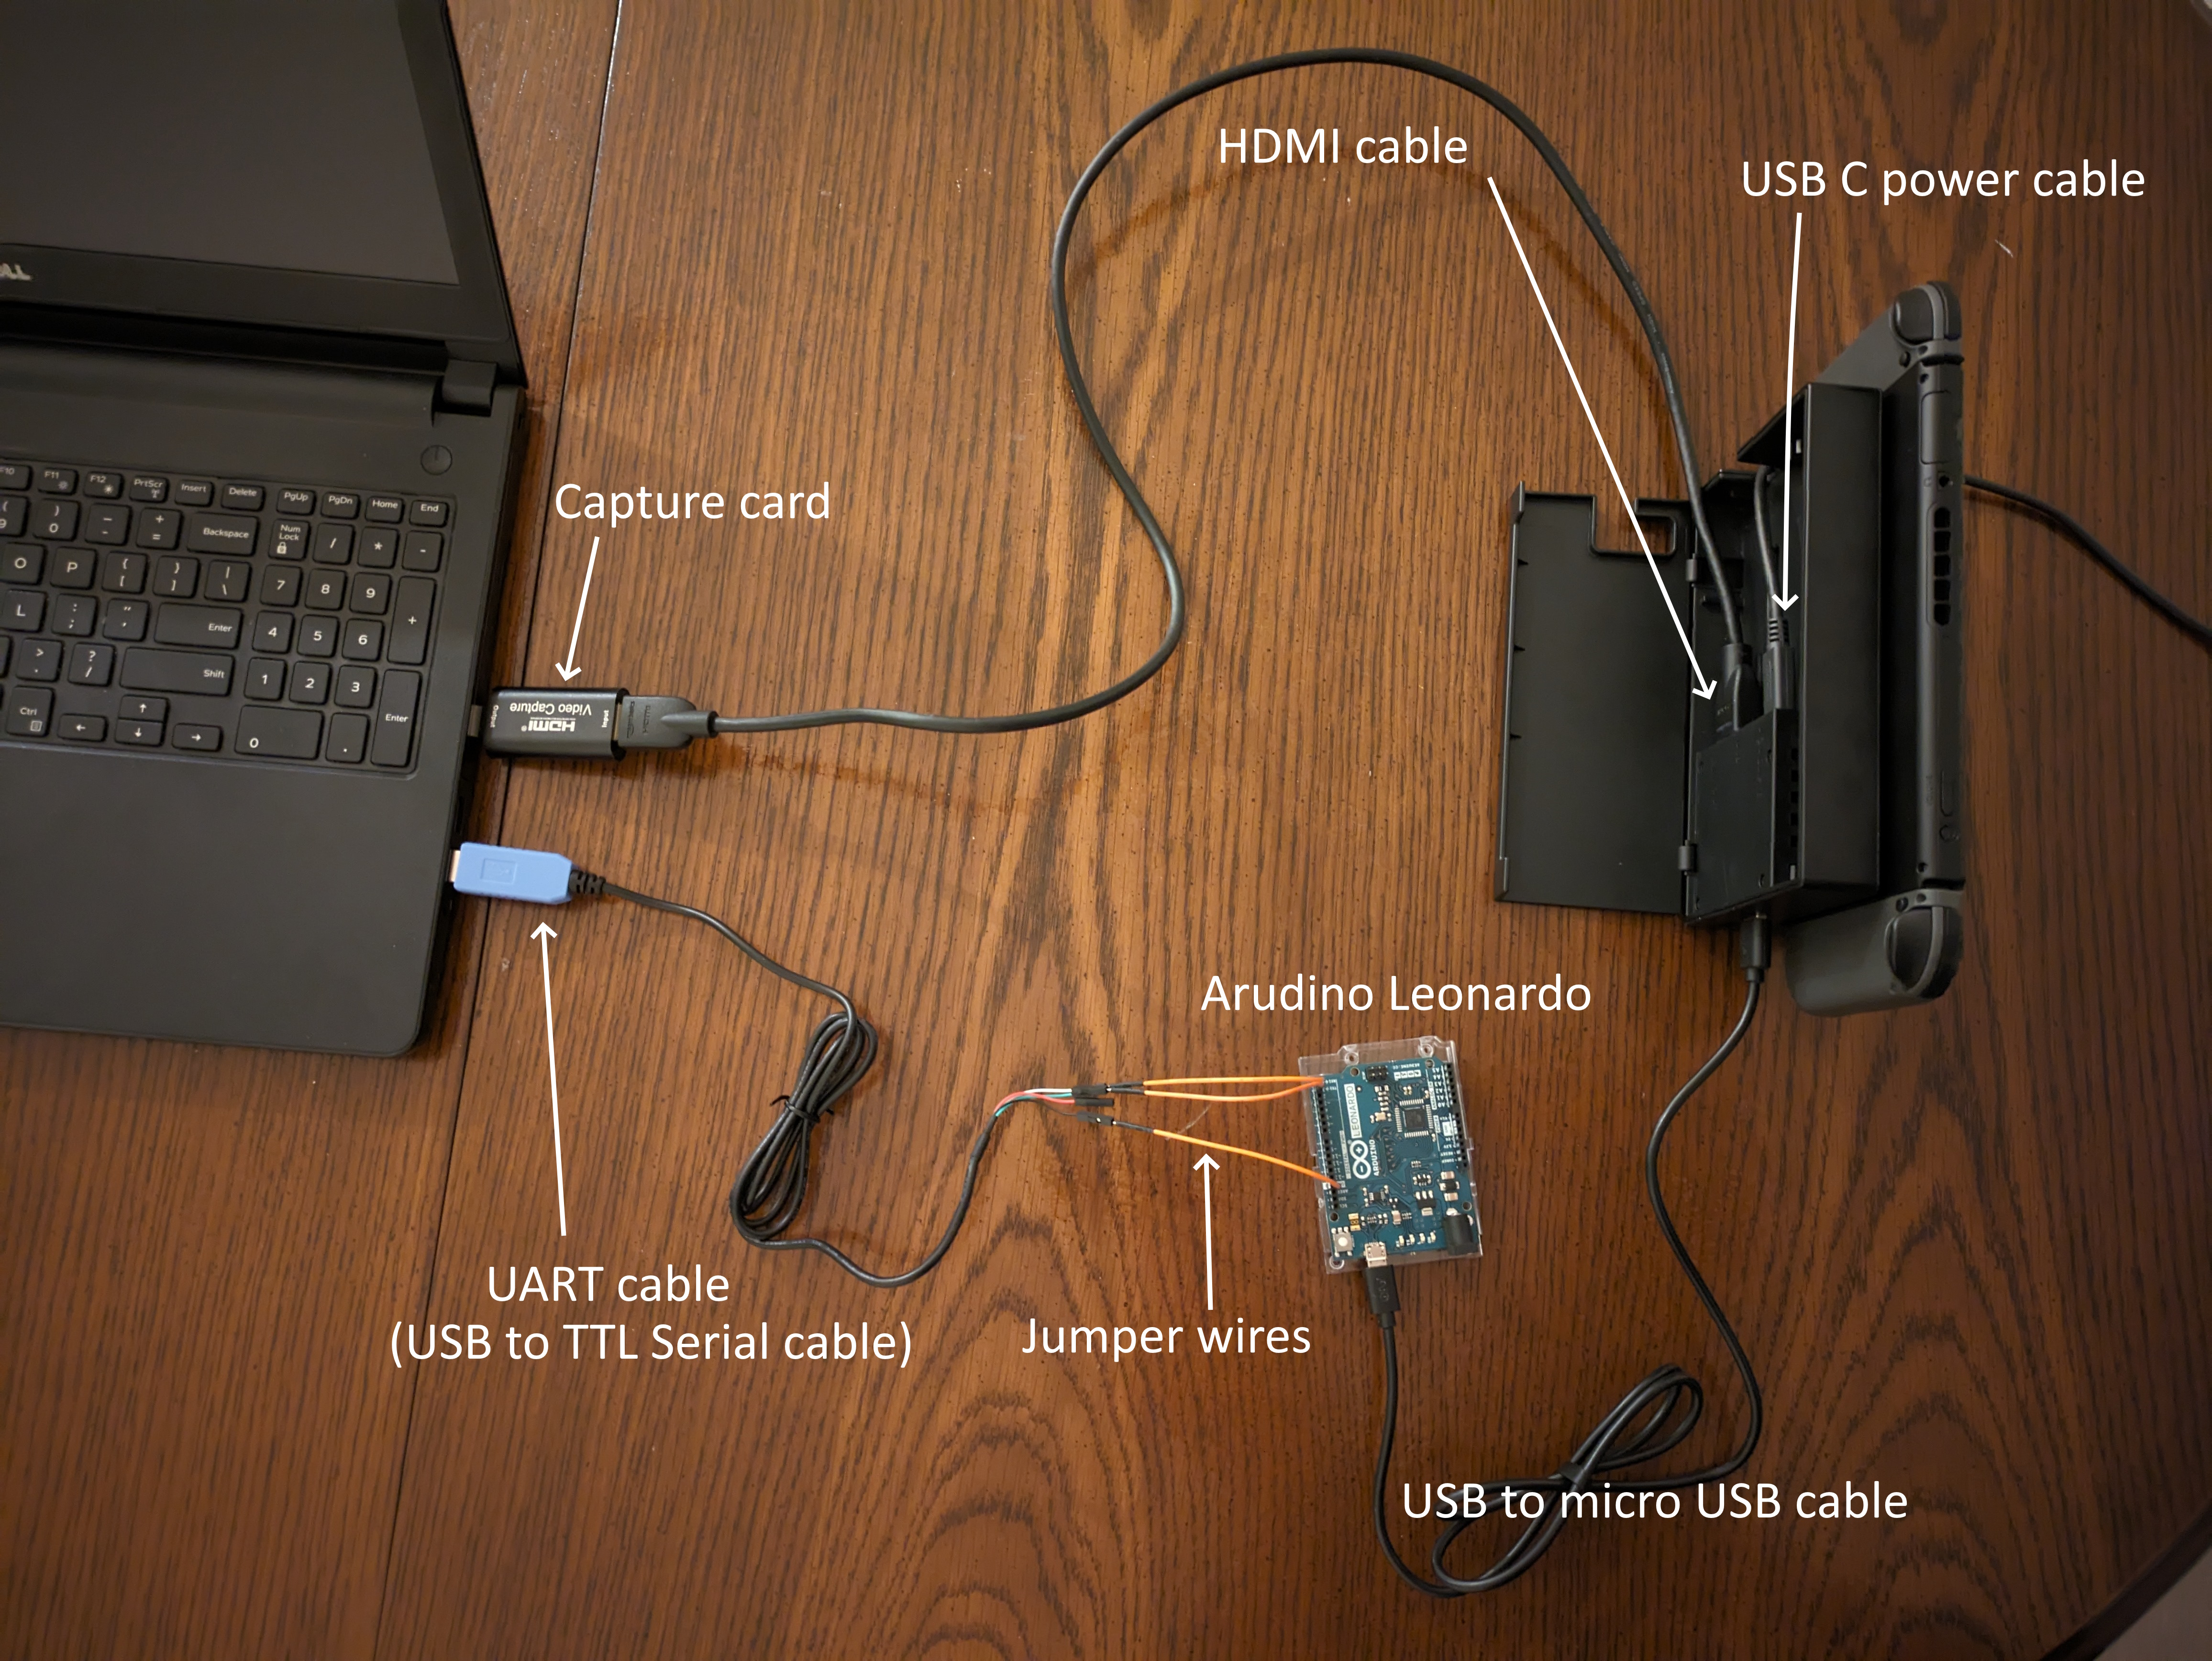
Step 4:
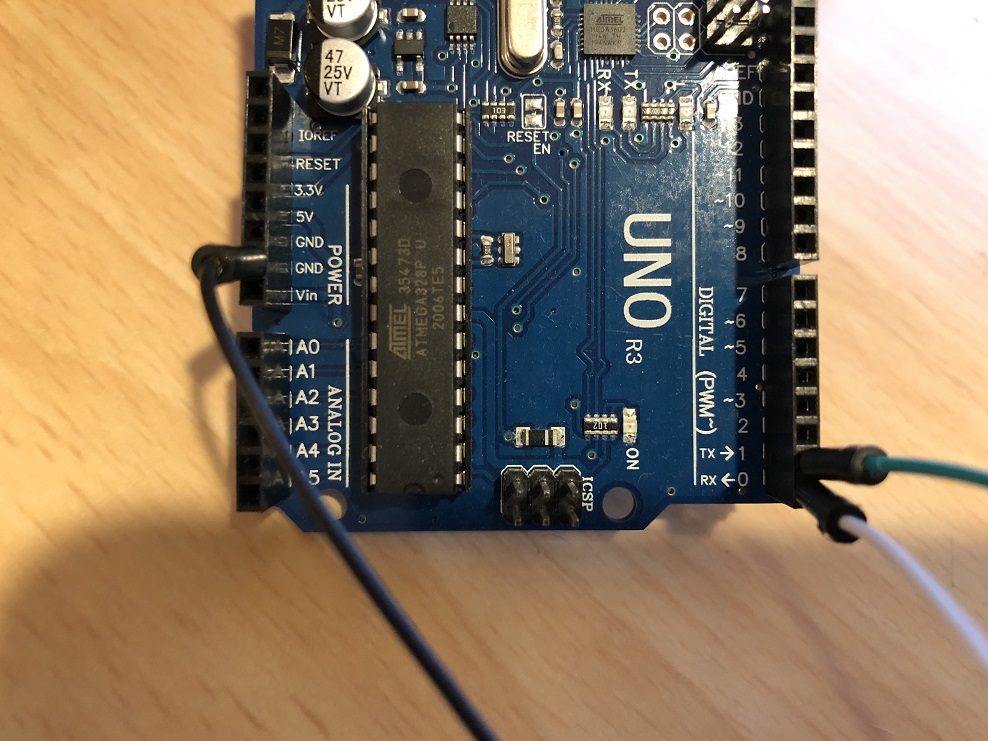
- Turn on your Switch and dock it.
- Connect your Arduino Leonardo to the Switch's dock.
- Connect the UART to your computer.
At this point, your final setup should look like this: (but with an Uno R3 instead of a Leonardo)
Software Setup:
Continue to: Wired Controller (AVR8) Software Setup.
Troubleshooting:
Docking and undocking the Switch resets or hangs the Arduino.
Main Article: Power Glitching
Credits:
- Kuroneko/Mysticial
Discord Server:
