Raspberry Pi: All Pico Models (Advanced Setup)
This is the advanced setup guide for the Pico and Pico 2 family. It is functionally the same as UART mode, but it will not glitch or reset when docking/undocking the Nintendo Switch.
Further reading: Power Glitching
This is the most difficult to do serial setup that we've ever done and is reserved for readers with extensive experience in circuits. Incorrect connections can lead to damage to the hardware components involved.
| Mode | Connections | Controller Support | Setup Difficulty |
|---|---|---|---|
| USB Mode | 1. Pico W's USB port -> Computer | Wireless controllers only: - NS1: Wireless Pro Controller - NS1: Wireless Left Joycon - NS1: Wireless Right Joycon |
Very Easy |
| UART Mode | 1. Pico's USB port -> Switch 2. Pico's pins 6/7/8 -> External UART 3. External UART -> Computer |
Both wired and wireless: - HID: Keyboard - NS1: Wired Controller - NS2: Wired Controller - NS1: Wired Pro Controller - NS1: Wired Left Joycon - NS1: Wired Right Joycon - NS1: Wireless Pro Controller - NS1: Wireless Left Joycon - NS1: Wireless Right Joycon |
More Difficult |
| Advanced UART Mode (this guide) |
1. Pico W's USB port -> Switch 2. Pico W's pins 6/7/8/39 -> External UART 3. External UART -> Computer |
Both wired and wireless: - HID: Keyboard - NS1: Wired Controller - NS2: Wired Controller - NS1: Wired Pro Controller - NS1: Wired Left Joycon - NS1: Wired Right Joycon - NS1: Wireless Pro Controller - NS1: Wireless Left Joycon - NS1: Wireless Right Joycon |
Most Difficult |
If you are here, we assume that you already have a working Pico (UART mode) setup. So this wiki will only cover the differences from the basic UART setup. Furthermore, the parts list that we will choose will be geared toward making the following (boxed) easy-to-use product with no exposed circuitry. You are free to do whatever you want.
Hardware Setup:
Required Hardware:
- A Raspberry Pi Pico microcontroller (any model without pins).
- A micro-USB to USB-A cable or adapter.
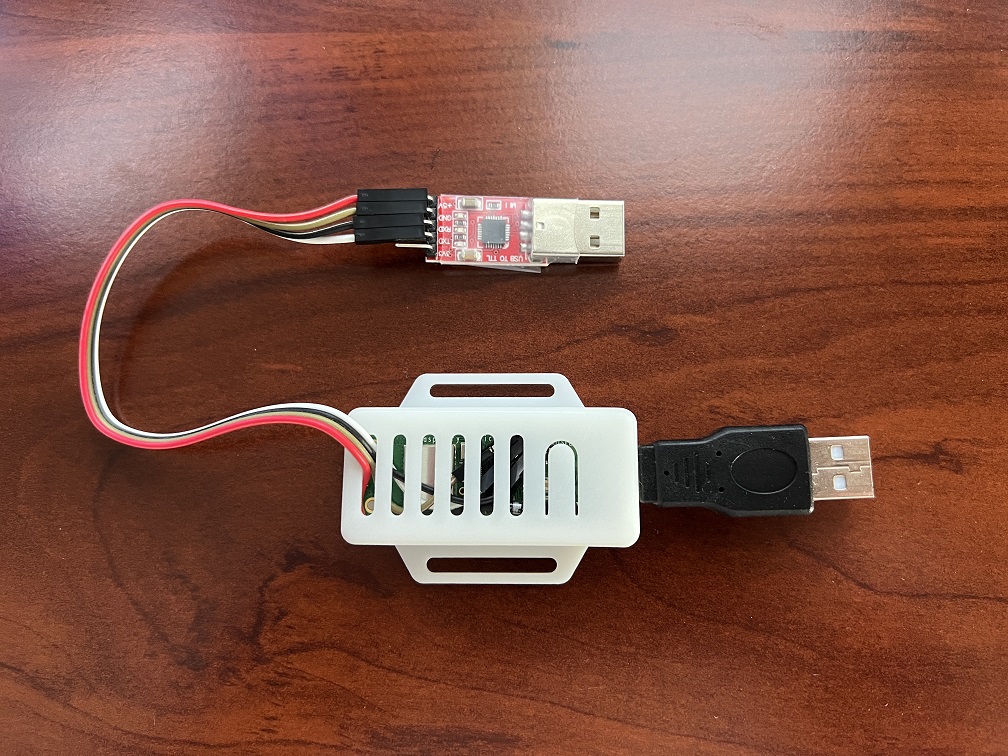
- USB to Serial TTL (UART).
- 1N5817 Schottky Diode.
- Press-fit Headers. (or soldering)
- Dupont connector kit. (or soldering)
- Pico enclosure. (only compatible with Picos without pins)
Building just one of these will be expensive since many of these parts can only be bought in volume. But the volume per-unit cost in parts comes down to about $12 USD.
Hardware Assembly:
Make the following connections:
| UART pin | Pico W pin |
|---|---|
| RX | TX -> GP4 (pin 6) |
| TX | RX <- GP5 (pin 7) |
| GND | GND (pin 8, or any other GND pin) |
| VCC (+5V) | VSYS (pin 39) via diode |
The difference from the regular UART mode guide is that here we do connect the UART's +5V VCC line. This allows the Pico to be powered by both the USB or the UART - thus allowing it to stay powered and not glitch or reset when the USB power is momentarily lost when docking/undocking the Switch.
It is important that the VCC <-> VSYS connection be done through a diode which only allows current in the direction of VCC -> VSYS. This is needed to prevent backflow through the UART when both UART and USB are connected and the USB side has a higher voltage.
Failing to use a diode (or putting it in the wrong direction) will short the computer with the dock and potentially damage all hardware involved!
Further Reading:
- Guide to powering the Raspberry Pi Pico
- Which Shottky diode do I need for redundant power to a Raspberry Pi Pico?
- Pinout and Circuit Diagrams
Here are some various pictures of a working setup:
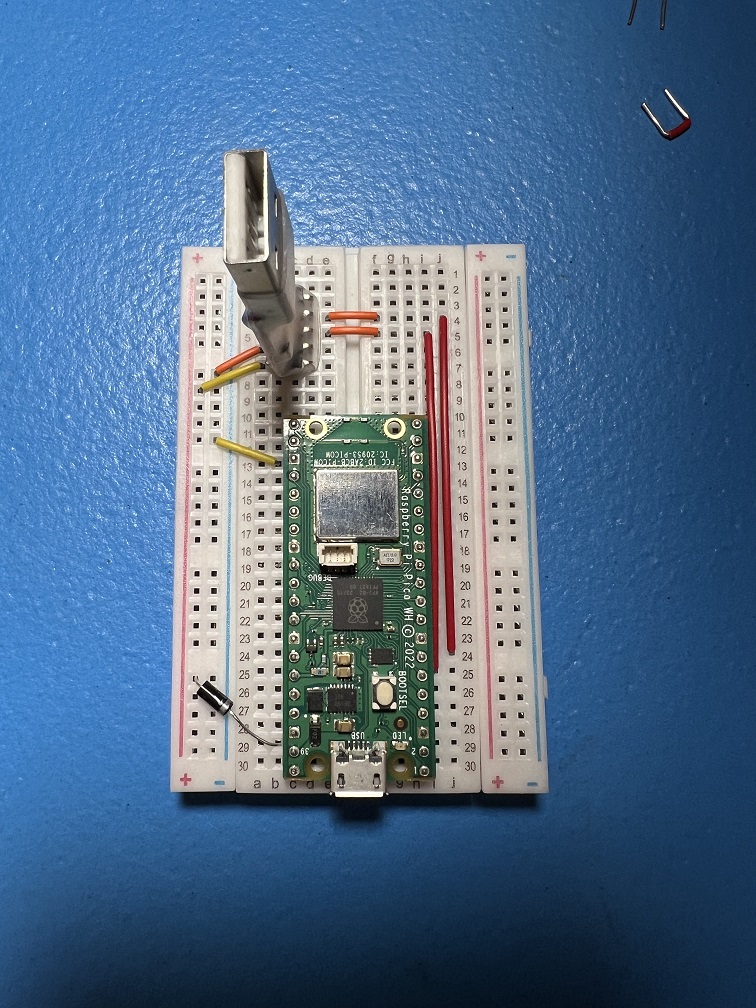
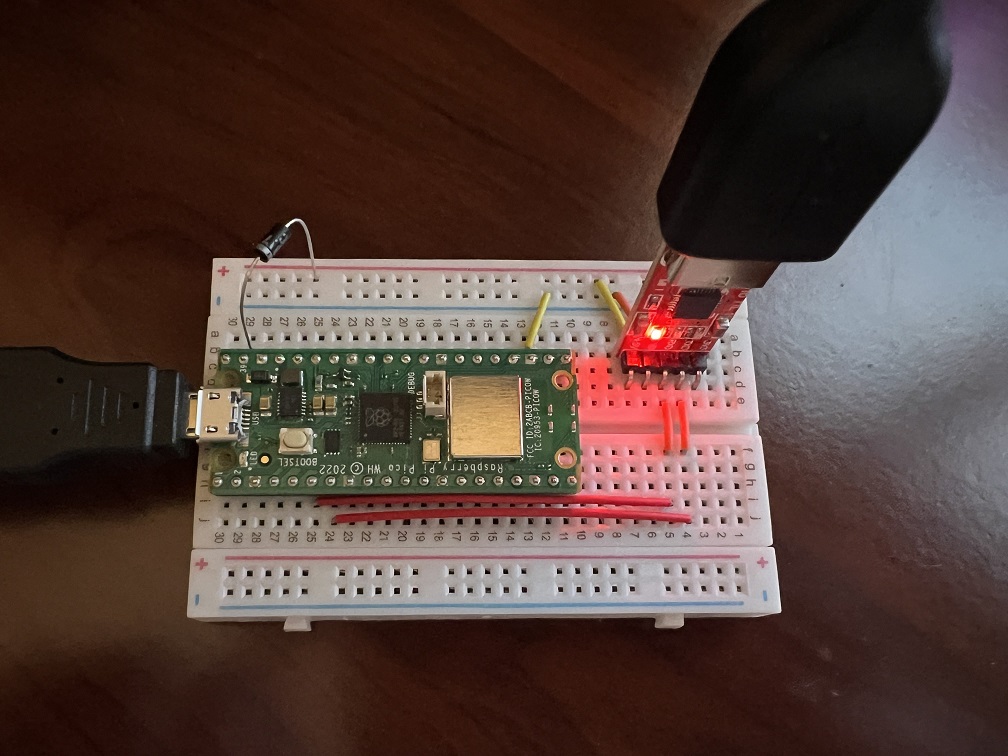
Breadboard Prototype:
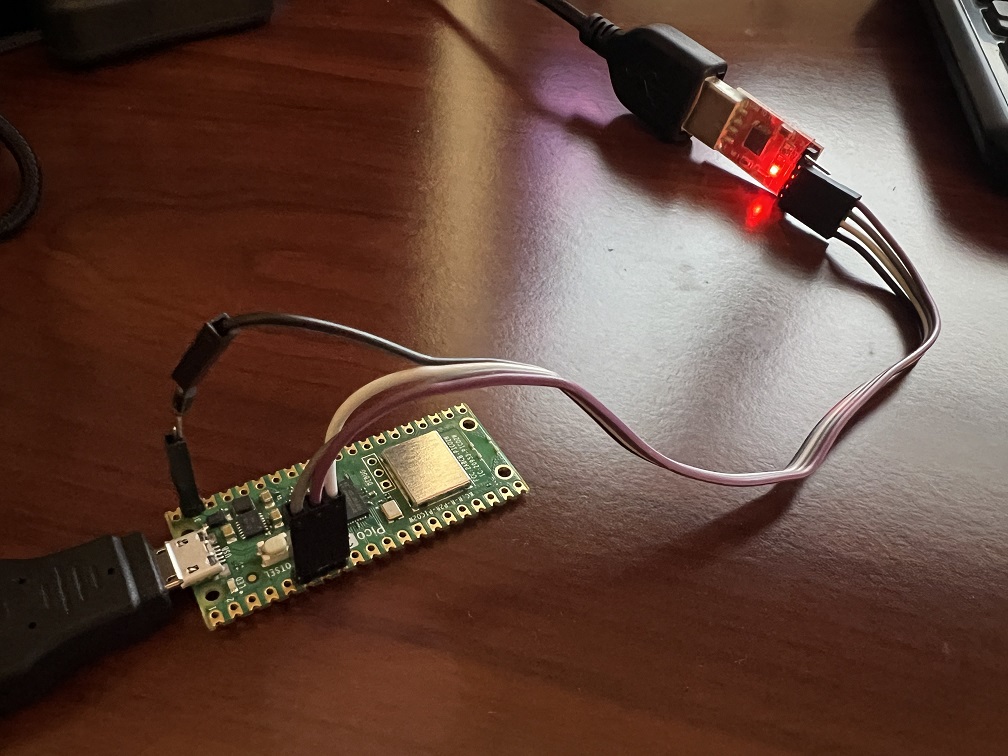
"Production-Level" Setup:

Software Setup
Everything is the same as the Pico UART mode guide.
Credits:
- Kuroneko/Mysticial
Discord Server:
